


Supplies:
- Rose Creations Spellbinders
- Cuttlebug machine
- puffy paint
- Polka Dot cardstock included in January Kit
- stamen included in January Kit
- tulle included in past kits
- glitter or stickles
- vellum
- embossing tool (optional)
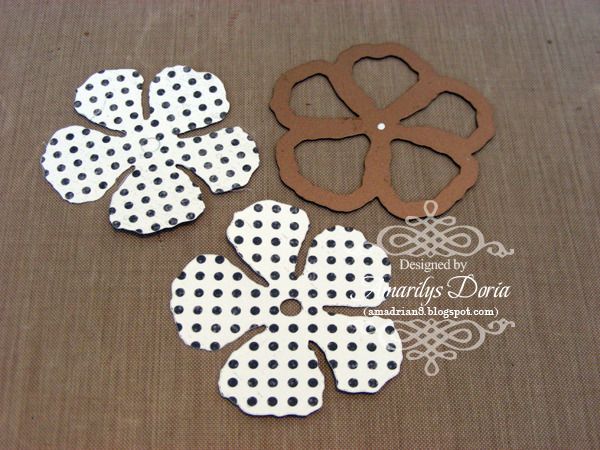
Step 1. Die cut two medium size roses using the Rose Creations Spellbinder die.
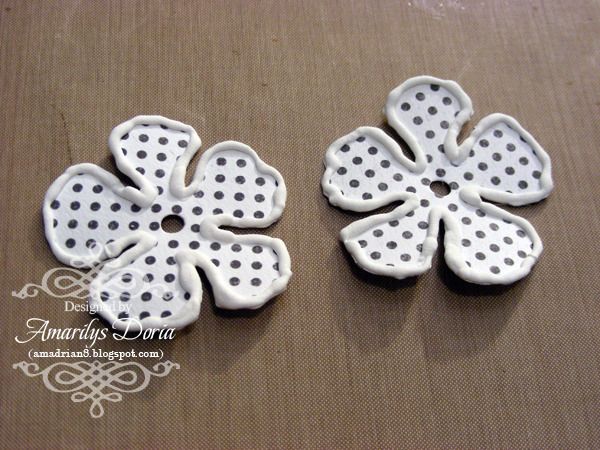
Step 2. Add puffy paint to all the edges and let it dry.
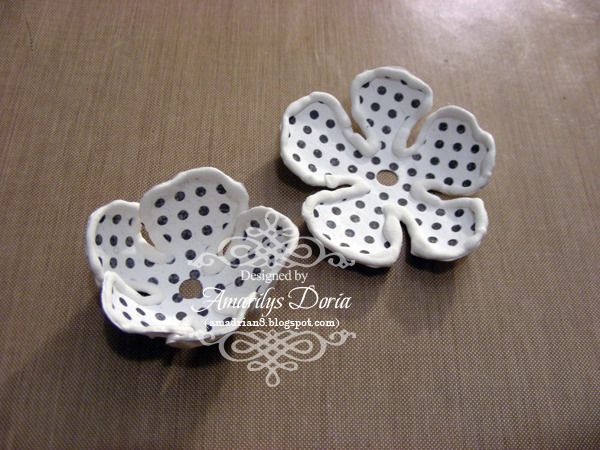
Step 3. Curl the petals up on both of the flowers using an embossing tool or your fingers.
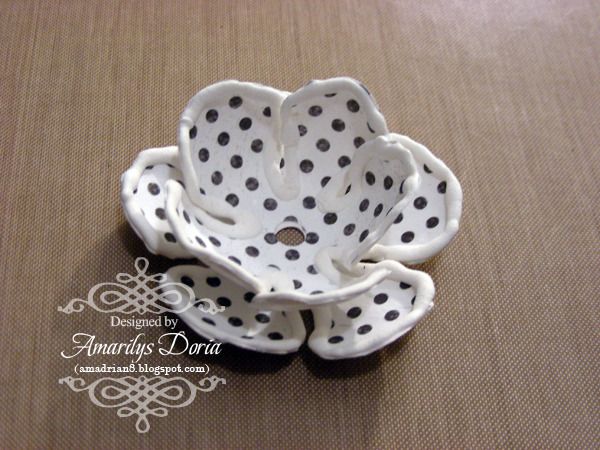
Step 4. Nest one inside the other, staggering the petals, to make a rose.
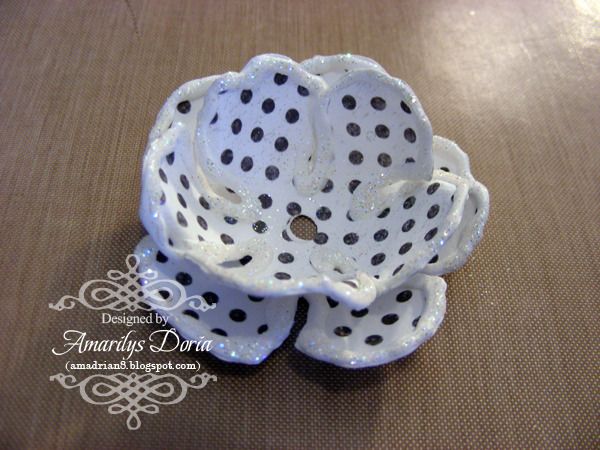
Step 5. Add glitter or stickles to edges and let it dry.
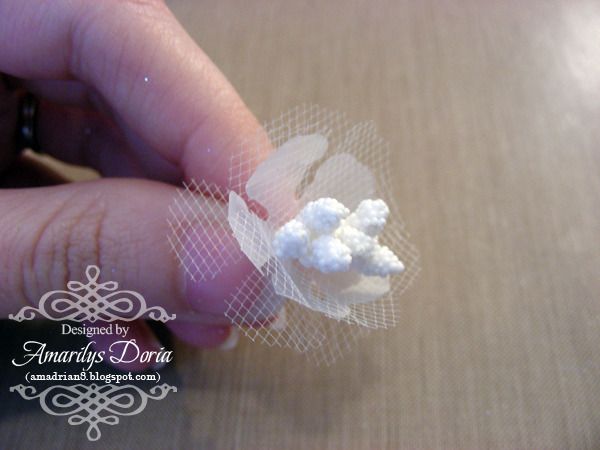
Step 6. To make the flower center, die cut two smaller size flowers out of tulle. You might need to run it through the Cuttlebug machine a few times. Also cut one small rose out of vellum. Gather a bunch of stamens included in the kit and run them through the center of the dies like shown.
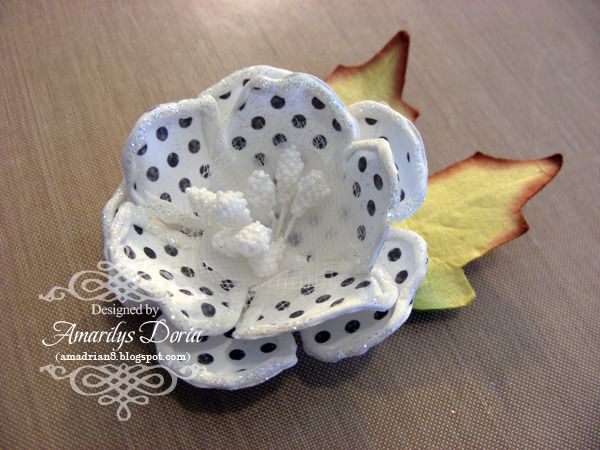
Step 7. Adhere flower center to the white flower and there you have it! Your very own 'Snowy Roses".
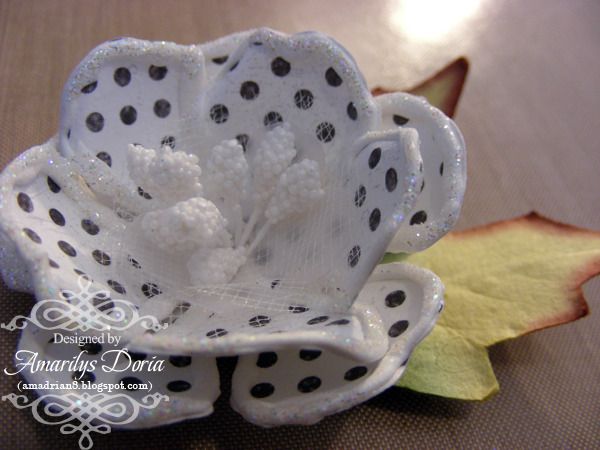
Another close up of the flower. You should give them a try! They are fairly easy to make!
Thanks for stopping! I hope that you are inspired to make something with this amazing kit! If you want to see more of my creations, please stop by my blog.


I love this tut. I was wondering how to create the snow effect on flowers. Thanks so much.
ReplyDeleteAmy, these flowers are stunning, thanks for the tutorial!! ~ Blessings
ReplyDelete