~~~~~~~~~~~~~~~
First up is my layout entitled "True Love", based on the Prima Build-a-Page sketch from January. I chose to scrap a picture of my husband from our wedding day.
This layout was made with the Main kit plus a few items from my stash (i.e. the keyhole heart, heart doilies; vellum and wood embellishments); the flowers are from the ScrapThat! December kit Flower Add-on and the metal Prima key is from the November kit Embellishment Add-on. I also used two colours of Tattered Angels Glimmer Mist - Latte and Tattered Rose, as well as Tattered Angels Chalkboard Glimmer Mist in Cherry Cola.
I used the Prima "Romance Novel" Wordsmith paper as the base page for this layout. I added the heart doilies and then stitched around the edge of the layout using a zig-zag stitch -- I wanted it to look sort of like a ECG readout. I cut lots of the smaller elements out of the Bookplate and Messenger papers to use in the layering and also used some Prima packaging in the layering.
Here is a close-up of the lower right side of the layout - the journalling is a quote from the P!nk song "True Love" - which also provided the title for the layout.
~~~~~~~~~~~~~~~
For my second layout, I wanted to show the versatility of the kit and went with a monochromatic, masculine layout. The photo of my sweet little boy was taken during his first train ride - the "Santa Train" - it truly was an "Unforgettable" day. I adore this photo and really wanted it to be the focal point of the layout, which is why it is the only real colour on the layout.
This layout is based on the February ScrapThat! sketch and was made with the Main Kit plus a few items from my stash (Twine, a brad, Distress Embossing Powder and Ink) and two pieces of Imaginarium Designs Chipboard. I used the natural cardstock as the base page and water-distressed the Harlequin paper for the first layer. I cut the title and other layering elements from the Dear John and Messenger papers and also added in some Prima packaging (LOVE using their packaging in layering). Here is a close-up of the photo/layering section. I did some hand stitching with twine along the edge of one of the layered papers.
I loved the hot air balloon and wanted to use it on the layout but wanted to dress it up a bit. So I added the twine to make it appear as if the balloon were suspended on the page. I didn't have a brad to match the layout, so I used a purple one, heated it with my heat-embossing tool and dipped it into my Distress Embossing Powder in Frayed Burlap to make it match the layout!
Finally, for the chipboard elements, I simply inked them with Distress Ink in Walnut Stain and roughly embossed them (i.e. here and there) with the Distress Embossing Powder in Frayed Burlap. Here is a close-up of the compass.
~~~~~~~~~~~~~~~
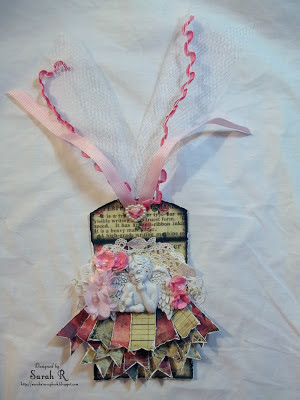
I also made two tags with the kit. For the full details on how I made this Cherub Tag, please see my Build-a-Tag tutorial here.
Here is the other tag I made with the kit. This one is a much more masculine design! I used two sections of an envelope from the Dear John page and stitched them together on the sewing machine. Added some ribbon lacing, flowers from the Flower Add-on and paper elements cut from the Dear John page to embellish. I also used some black tulle left from the November ScrapThat! kit for the top of the tag.
Here is a close-up of the "Inspired" tag.
Thanks so much for visiting the blog today! Be sure to order your February ScrapThat! kit soon as they are going fast - it is a GORGEOUS kit to work with!


What gorgeous project, Sarah! Love that you got 2 guy pages from the kit!
ReplyDeleteSuch gorgeous pages, Sarah!! Unforgettable is my fave! ~ Blessings, Tracey
ReplyDeletegorgeous work, just stunning :)
ReplyDelete