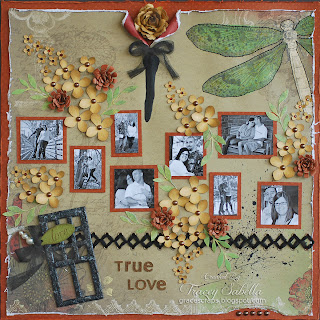
Today, I would like to share with you the details of my three layouts using the amazing ScrapThat October Kit featuring the gorgeous Prima Tea Thyme paper line.
First Dance
Tips and Techniques:
Transparency Butterflies ~ These sweet butterflies were created by printing butterfly images onto inkjet transparency paper. While the ink was still wet, I covered the images with clear embossing powder and heat set. To prevent the transparency paper from shrinking and warping, I kept the heat tool further from the image than I normally would, and took my time melting the embossing powder. While the embossing was still hot and wet, I added more clear embossing powder and heat set again. Once it was set and dry, pulled the wings forward from the body for some added dimension.
Hand Stitching ~ I drew a curved, looped line around the border of the page stopping at the edge of the bricks and horizontal paper strip. I used this line to pierce stitching holes for my hand stitching.
Ceramic Stucco Bricks ~ I sprayed the back of my brick stencil with some removable adhesive, allowed it to dry, then placed it on my page where I wanted a brick wall image. I used a craft spatula to spread the Ceramic Stucco Medium over the stencil. After carefully removing the stencil, I used my heat tool to dry, then moved the stencil to coordinate with the bricks already on the page and repeated this process around the page. Once all the brick work was dry, I spritzed with several colors of inks and mists to get the brick color I was looking for. I love that they are mottled and the color varied just like it would be on an actual brick wall. You can't see it in the photo, but the walls in the reception hall were exposed brick, making this a perfect background for this page.

Altered Flowers ~ I altered the Petaloo flowers with several shades of mist and gesso. For the flower on the left side, I removed the center and used the pearls from the kit to create a new one. The Prima clock was a perfect addition to this cluster.
Vines ~ The swirled vine tendrils were created with wires cut from the kit flowers and leaves. I simply wrapped them around a small diameter paint brush, then pulled and bent them to look more natural.
Love of My Life
Tips and Techniques:
Twine Flowers ~ I created the twine flower from jute twine. My tutorial for these flowers can be found
here.
Handcrafted Flower ~ I created the pink flower with the Grand Peony die set, and added one of the kit pearls to the center.
Wood Flower ~ I used a rock salt, mist, crackle technique on the wood flower. I'll be posting a photo tutorial on this technique next month.
Altered Ticket ~ I liked the hand on this ticket, but wanted different words to go with my layout, so I painted around the hand with gesso, inked the edges with black soot Distress Ink, and hand wrote "True Love."
Drip ~ I put a blob of gesso below the torn edge and tapped my paper to encourage the drip to form, then placed a flower created with the Rose Creations die set at the top of the drip.
Scalloped Circle ~ This was so easy peasy. I cut a border strip, then snipped each of the scallops and arranged them around the layered circles, adhering each piece as I went.
Swirled Twine ~ I adore the look of something swirling across my page and through the flower clusters, dots of glue hold the twine in place.
Colored, Stenciled, Modeling Paste ~ I spread the modeling paste over my stencil, allowed to dry, then used Distress Markers to color. I also used this technique in the bottom corner for my title and above the scalloped circle without the color for the phrase "I adore you!"

Layered Embossed Butterfly ~ The tutorial for these sweet butterflies can be found
here.
Forever
Tips and Techniques:
Handcrafted Flower ~ I created the large pink flower using my Grand Peony die set and kit paper, then added pearls from the kit to create the lovely center. I lightly inked the petals with the handy Prima ink included in this kit.
Misting ~ I glimmer misted slightly above where my photo was to be placed and then misted lightly with water to encourage the drips that you see below the photo dripping into the flower cluster.
Title ~ The felt letters were a bit grey so I inked them with distress ink to coordinate with my page. I do NOT recommend doing this. Because the letters are felt, they did not dry. I kept patting with paper towels until they no longer removed ink when patting. :-)
Scrunched Ribbon ~ I put some strong double sided adhesive onto my paper where I wanted the scrunched ribbon, then starting on one side with a long ribbon, started scrunching and randomly laying the ribbon onto the adhesive, then when I was finished, trimmed the other end. In a couple places where the ribbon wanted to pop up, I went back and added a bit more adhesive.
Wet Paper Scrunching ~ I wanted a depression in the top of my mat to set this lovely wood Prima clock. I wet the paper and pushed it down with my fingers and let it sit to dry before tucking the clock behind the little depression I created. I sanded the edges of the clock for a more distressed look.
Hand Stitching ~ the edge of the center mat was hand stitched with crochet thread. I have discovered that a single strand of crochet thread looks gorgeous and is easier to stitch with than several strands of embroidery floss.
and the October Kit is available for sale in the
store.


