Monday, November 19, 2012

Layout of the Week - "The Journey Awakens the Soul" by Pam Ellis

Our ScrapThat! Layout of the Week is this gorgeous page by Pam Ellis. Pam created this layout based on the November sketch - and I just love the colour palette, punchwork and fabulous embellishing!

"The Journey Awakens the Soul" by Pam Ellis


Congratulations Pam!!

To receive your ScrapThat! LOTW Blinkie, please private message me (Sarah-R) on the Ning site!

Saturday, November 17, 2012

Tracey's November Kit Projects

It's Tracey here to share my
November Kit projects with you. 

This first page is of our son and his bride sharing their private vows. Joseph wrote three pages of vows to his sweet Rachel, and the sound tech had to keep playing the song over again to give him enough time to share everything. I hope that he continues to treat her like the precious gift she is for many years to come. 

"Amore" 
Using the MK, EAO, and FAO Kits:

The Bo Bunny Serenade Collection lends itself to some wonderful fussy cutting. I fussy cut the vines and large dragonfly, along with the green and yellow medallions in the banner.

A light brushing of coordinating stickles gives the dragonfly just the right amount of sparkle!!

The large flower in the corner is a gorgeous Prima flower from the FAO kit and I altered one of the kit flowers with some brown mist. The kit cardstock was used to create the remaining flowers using my Bitty Blossoms Dies along with Tattered Pinecone.

My title was created with a stencil and modeling paste. The charming dragon fly is a charm from my stash that I alcohol inked to coordinate.

This next page features our new daughter-in-law, Rachel, with her bridesmaids having a little fun before the wedding. I used Amy's gorgeous November sketch for inspiration.

"Beautiful"
Using the MK, EAO, and FAO Kits:

Be sure to come back next week for my tutorial on how to create the texture on this chipboard door. Most of us have corrugated board around the house. I especially like the ones with the tiny corrugation, but any box you have around will work to add texture to our pages like the mat behind my photo. Just spritz with an acid reducing product. I also did a bit of hand stitching on this mat.

 The kit flowers made such gorgeous clusters on this page. I added a piece of Dusty Attic Holly Chipboard.

My third and final page was created using the Sketchabilities sketch for their challenge sponsored by ScrapThat!

For Joseph and Rachel's wedding, I created their card box, and these are the photos I used across the front of the lid.

"True Love"
Using the MK only:

Another one of my chipboard doors. The black Tulle was cut into 2 inch strips and used for the lacing. (The eyelets came from my stash.)

Here is one of my flower clusters created with kit cardstock and my Martha Stewart hydrangea blossoms punches and Donna Salazar Bitty Blossoms dies.

I tucked another Bitty Blossom flower into my peek-a-boo tear with a paint drip and tied with a tulle ribbon.

Finally I created this quick little card with some of my extras from this generous kit!!

"Fall Birthday Card"
Using the MK and FAO kits:
 Thanks so much for stopping by. More details and larger photos can be found on my blog.

ScrapThat! is currently accepting new subscribers.
For more details stop by our store.

Friday, November 16, 2012

November Sketch Challenge Winner


Hi everyone, Amarilys here. We had 8 amazing entries for the November Sketch Challenge and I'm glad that  we use random.org to choose a winner because there is no way that I can!
So, according to random.org the winner is.......

Lean de Ruiter
Congrats Lean! 

I want to take this time to encourage you to play along the monthly sketch challenge. The next one opens on November 30th during the blog hop. Hope to see you there!
Thursday, November 15, 2012

November DT Challenge - Autumn Colours

It's Sarah here to host the November DT Challenge. I can't believe Autumn is winding to a close already. To celebrate this wonderful season, we have an Autumn Colours Challenge for you! (Who doesn't love a colour challenge?) Here are the colours you must use on your layout for this month's DT Challenge:
Here is my example using this page from the 
November Kit. 
Check out the post in the ScrapThat! Forum for the contest guidelines and prize information.

I can't wait to see what you create!

Wednesday, November 14, 2012

November Kit BAP with Amarilys

Amarilys here and today I want to share with you a BAP. Now, I took a lot of pictures along the way so bear with me. I didn't want you to miss anything! :)

So, let's get started!


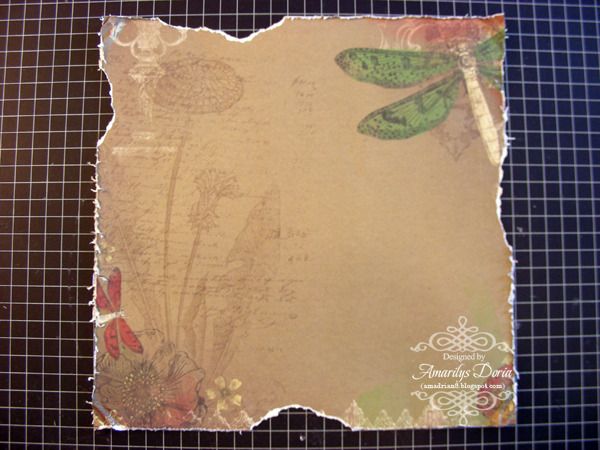
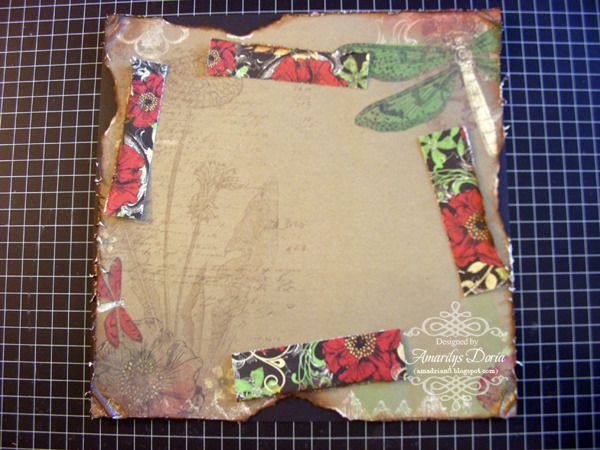
Step 1. Distress your pattern paper with the Tim Holtz distressing tool. Tear random areas around the page and crumble the corners with your fingers.


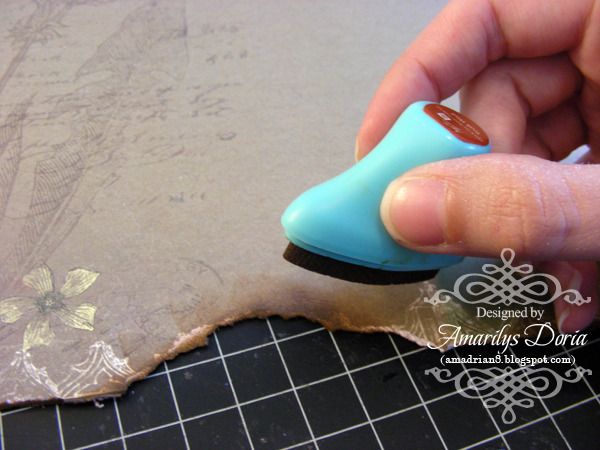
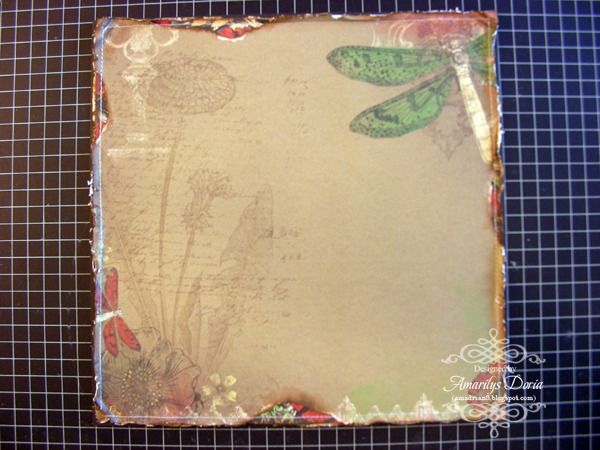
Step 2. Use the Prima ink and ink the edges to give it a worn look.


Step 3. Trim a 12"x1.5" strip of  coordinating paper, distress the edges with the tool and cut to size to fit under the torn areas from the background paper. Adhere the strips of papers to the back of the background paper, making sure that the distressed edges alight correctly.


Step 4. Adhere your pattern paper unto a black cardstock and machine stitch the edges.

 
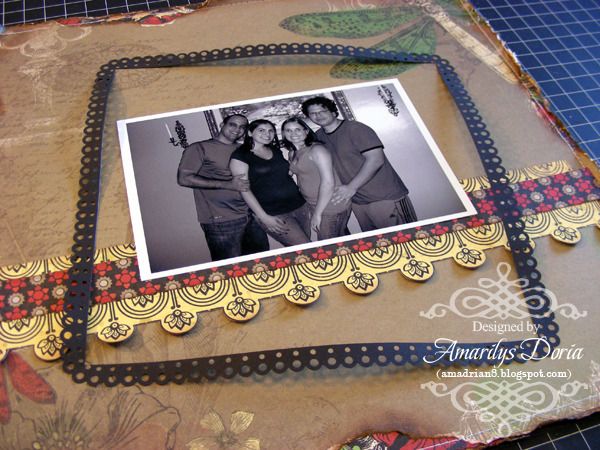
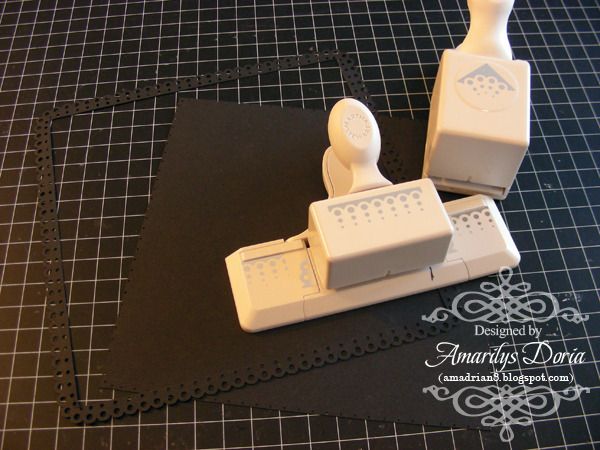
Step 5. Using Martha Stewart Punch Around the Page Scallop 3 Dot, punch a 8.5" square. Cut out the center part and discard.


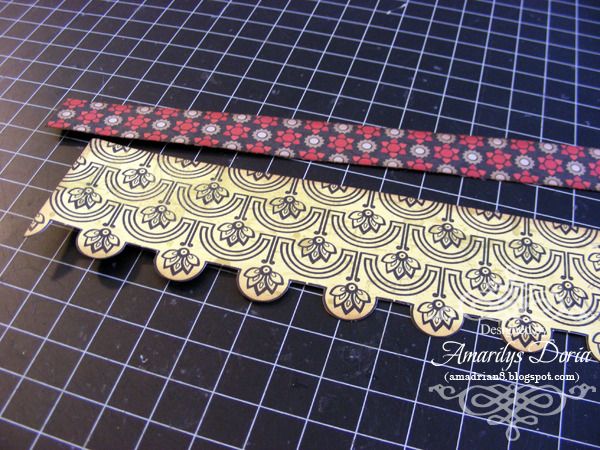
Step 6. Fuzzy cut the yellow pattern paper to make scallops and trim a 0.75" paper of the back side to layer.


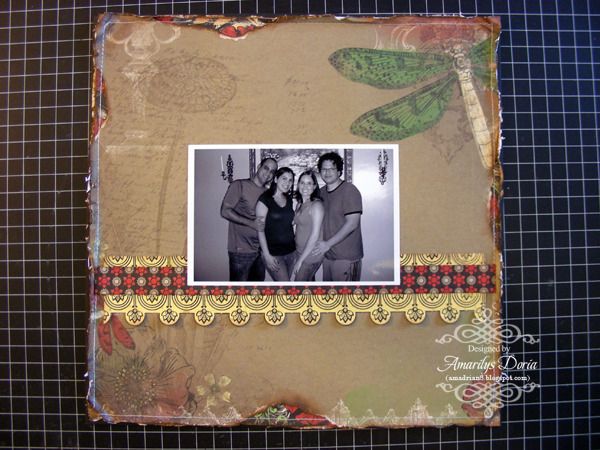
Step 7. Add your black and white photo over the center over the layered strips of paper.


Step 9. Adhere the black frame but only add adhesive in the corners and one random spot in each side so that the frame looks a little raised. This will give it some dimension.


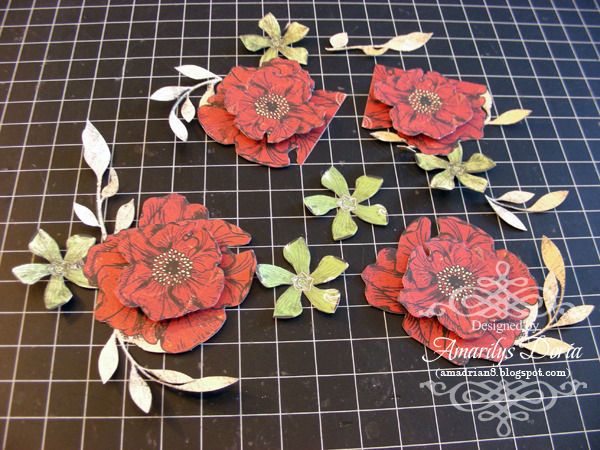
Step 10. Fuzzy cut some flowers and layer them to give them dimension. It's ok if some have straight edges. You will tuck these in under the picture.


Step 11. Add the fuzzy cut flowers around the photo as shown. Tuck in a Prima wooden door on the left side of the picture and under the flowers.


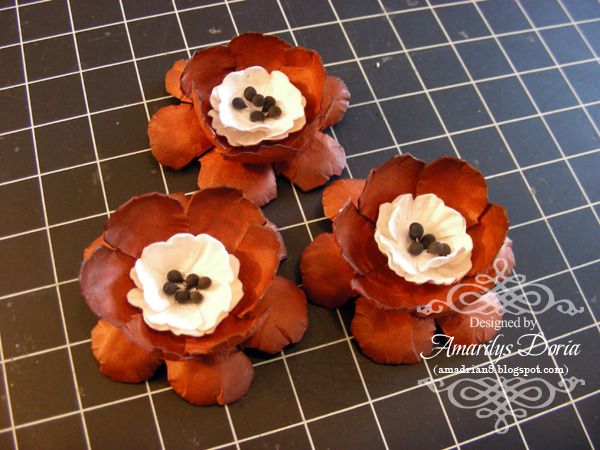
Step 12. Hand make some flowers using the red cardstock that comes in the kit and the white flowers.


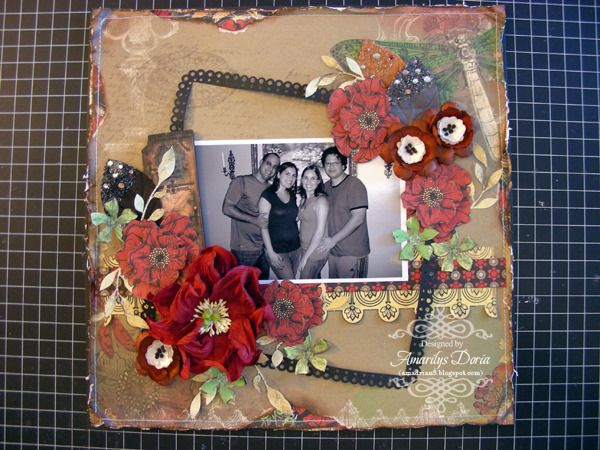
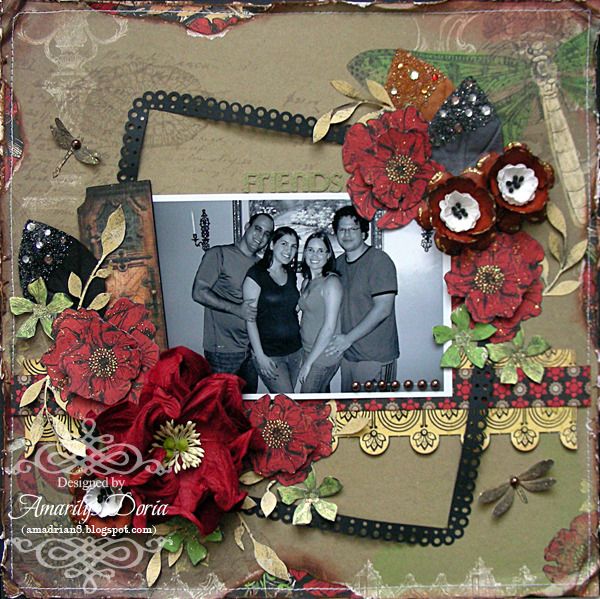
Step 13. Fill in the cluster by adding the handmade flowers, large red flower included in the kit and the leaves from the EAO. I then added some fuzzy cut dragonflies and a title above the picture.

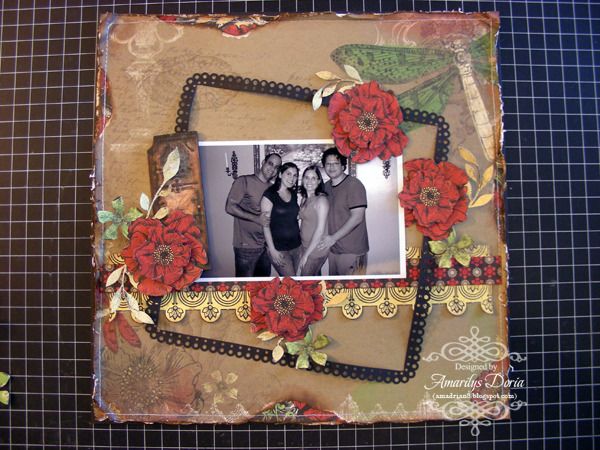
Here's my finished layout which is based on the November Sketch (Tomorrow is the last day to ENTER):


Thanks for stopping! I hope that you are inspired to make something with this amazing kit! If you want to see more of my creations, please stop by my blog.

Monday, November 12, 2012

November Kit Creations by Marilyn

Hello everyone!!  Here's Marilyn to show you my creations with the Fabulous November Kit "Remember when"
Sadly this is my last kit but it was a great time and wonderful opportunity to be in this talented team..
Thanks Kaitlyn and girls, I already miss you!!!!


And here is my first page based in the Beautiful November sketch by Amarilys Doria.


1- PURE LOVE

This page is about my kids a few years ago... I adore this picture.
I worked with the main kit, EAO and FAO.


Closer details...


My second page:

"NEW LOOK"

The second page is about my new hair cut.  I used the Main kit, FAO and EAO.  I used the Zva blings like buttons and with the twine made a loops buttonholes to try to look like a line of pearls buttons like the bridal gowns.


Closer details:


And the third page is based in the Sketchabilities' sketch....

3- Primas (cousins)

I made this page with the Main kit.


Closer details...


I hope this inspire you to work with this fabulous kit.

Thanks!!!
Marilyn Rivera


Layout of the Week ~ "Cherished" by Dana Tatar

Our ScrapThat! Layout of the Week is this gorgeous page by Dana Tatar. Her whimsical style and the blinged hot air balloon caught my eye.

 "Cherished" by Dana Tatar
To see more of Dana's gorgeous work, stop by her blog, They Call Me Tatar Salad.

Congratulations Dana!!

To receive your ScrapThat! LOTW Blinkie, please email me at:
tracey@scrapthat.ca

Friday, November 9, 2012

Sarah's Mini-Fan Embellishment Tutorial

Sarah here with a tutorial on how to create the mini-fan embellishments from my "Sisters" layout - done with the ScrapThat! November Kit "Remember When . . . " Here is my layout with the fans on it!
And here is the tutorial on how I created the fans!

Mini Fan Tutorial
Items required:
Craft Knife//Sharp Scissors
Scoring Tool
Heat Embossing Tool
Strong White Craft Glue
Patterned Paper
Craft Sticks
Brown Ink pad (optional)
Patterned Stamp
Watermark Ink
Embossing Powder
Scrap (i.e. waste) Paper


1. Cut strips of patterned paper for the fan – for the fans on my layout, I have used strips that are 2-inches wide by 7-inches long.

2. Ink, Stamp, Emboss Sticks
  • Ink the craft sticks with the brown ink (you can skip this step – but I liked the darker colour of the inked sticks). ALLOW TO DRY thoroughly before doing the next three steps.

  • Stamp the craft sticks with your patterned stamp using watermark ink.
  • Sprinkle the stamped area with embossing powder – make sure to tap the sticks and get all the excess embossing powder off so that the pattern will be clear.
  • Use your heat tool to set the embossing.


3. Stamp/Emboss Paper
  • Put the scrap (waste) paper over your patterned paper strip so that only about ½ an inch of the long edge of the paper is exposed.

  • Stamp along the exposed edge of the patterned paper with your stamp using watermark ink.
  • Sprinkle the stamped area with embossing powder – make sure to tap the paper and get all the excess embossing powder off so that the pattern will be clear.
  • Use your heat tool to set the embossing.


4. Fanfold/Accordion Fold your Patterned Paper strip.
  • Determine the width of the fold you want. I based this on the width of the mini-popsicle sticks I used – so each fold is 3/8-inch.
  • Score the paper every 3/8-inch (or whatever measurement you’re using) using your scoring tool.

  • Fanfold your paper – you want the ends of the fan to fold backwards so that the craft sticks aren’t exposed once they’re affixed to the paper.
5. Distress the fan (optional)
  • Use your knife/scissors to gently distress the edges of the patterned paper.

6. Affix the craft sticks
  • Use a very strong craft glue (Aleene’s Tacky Glue works well) to affix the craft sticks to the ends of the fan – leave a good amount of the craft stick exposed at the bottom of the patterned paper strip. ALLOW TO DRY thoroughly.

  • Affix the two exposed ends of the craft sticks to one another to create the fan – you can easily adjust the width of your finished fan at this stage by adjusting the angle at which the sticks are joined.

Thanks for dropping by today - I hope you'll give this tutorial a try - be sure to post to our ScrapThat! Gallery if you do!