Monday, December 31, 2012

Blog Hop and LOTW Winners and Announcements

**Blog Hop Winner**

ScrapThat! would like to thank each of you who participated in our January Blog Hop. Our winner selected by Random.org is:

Cathi O'Neill
Please send your mailing address to tracey@scrapthat.ca
Congratulations Cathi!!
You have three days to claim your prize.

**LOTW Winner** 

Hi everyone...Sandi S here to today to share my choice for LOTW. There are so many beautiful images in the ScrapThat! Gallery but this one was my favorite!
Creating Memories
By Cathi O'Neill

Would you believe that Cathi just started creating layouts this past summer...wow! She has it mastered!
Love the beautiful design and background textures, the pretty colors and sweet photos!
Big congrats Cathi!
I will be sending you your LOTW blinkie!

Congratulations Cathy on being a double winner this week!!

**Dusty Attic Announcement**
The Dusty Attic order has arrived and will be shipped out with your January Kits.

**Final Day**
December 31 is the final day to submit your applications for our Social Media Design Team position. Details can be found here.

**December Sketch Winner**

Be sure to check out Amy's post announcing our December Sketch Winner.

Happy New Year 
From all of us at ScrapThat!

December Sketch Challenge Winner


Hi everyone, Amarilys here. We had 5 amazing entries for the December Sketch Challenge and I'm glad that  we use random.org to choose a winner because there is no way that I can!

So, according to random.org the winner is.......


Pam Ellis
Congrats Pam!

I want to take this time to encourage you to play along the monthly sketch challenge. The next one is open already and closes on Jan 15th! Hope to see you there!

I also want to wish each and everyone of you a Happy New Year!

Friday, December 28, 2012

ScrapThat! January "Flakes of Snow" Kit Reveal/Blog Hop


Welcome to the ScrapThat! January Kit Reveal and Blog Hop!! 

We are so excited to show you our frosty wonderland themed January kit. Not only does it feature the beautiful "Powder Mountain" line by BoBunny, but BoBunny is also joining us on our blog hop this month!! Leave a comment on their blog post for a chance to
win a BoBunny prize package!

We are so thrilled to have the amazing Kelly Klapstein
join us as our January Guest Designer!


Kelly is a contributing writer for Canadian Scrapbooker magazine. Not only does she create amazing pages, but she also loves to share her passion through teaching. She was a Featured Instructor at the 2012 Great Canadian Scrapbook Carnival.

So, without further ado . . . introducing our
~ January Kit Reveal ~ "Flakes of Snow"

Featuring BoBunny's "Powder Mountain" line, this kit matches crisp whites and blues with the earthiness of warm browns. When you open the box, the sparkles and textures just long to be played with!

Included are flowers from Prima and leaves from WOC, jewels and buttons from BoBunny, multiple ribbons from May Arts and more! Don't just think winter, as our DT will show you, this kit offers myriad layout possibilities!

Main Kit


Embellishment Add-On


Flower Add-On
 

Paper Add-On

More details on this sparkling Collection can be seen here: ScrapThat! Store

We are currently accepting new
Kit Club Members.
For more information,
complete the form on the link below:

Look what Amarilys created for
January's sketch challenge!
See details about the challenge here: Sketch Challenges

Everyone is welcome to participate, all entries due by January 15th

Our Blog Hop features 11 fantastic blogs including our Design Team.

We have been scrapping away and are so excited to show you our  creations!

Our SPECTACULAR January Blog Hop Prize
is a ScrapThat! July Main Kit,
 "Summer in My Garden", featuring Fabscrap's Organic Collection:
To qualify for this month's FABULOUS Prize you must complete the following:

* Visit each blog listed on the hop to see what each designer has created using this month's kit and sketch (comments are very much appreciated).
* Each designer's blog hop post will feature a word to make up a secret sentence, collect these
words along the way.
* You must become a FOLLOWER of each blog along the way and LIKE us on our Facebook Page!
* Post the ScrapThat! Blinkie on your blog.
* For you last stop on our Blog Hop return here to the ScrapThat! Chat Blog.
Leave a comment letting us know you have
completed the hop.
(Please do NOT include the secret sentence in your comments.)

*Email the secret sentence to Tracey Sabella: tracey@scrapthat.ca
The Blog Hop ends Sunday, December 30 at Midnight EST

The prize MUST be claimed within 3 days of the forum announcement which will also be made on the ScrapThat! Blog.
~ If left unclaimed a NEW winner will be chosen ~
**Winner will pay actual shipping costs for sending the kit from Canada.**
Shipping costs will be invoiced via PayPal unless you are a kit member, then your prize will be shipped with your monthly kit.
Prizes won during the month will be mailed out the first week of the following month.
Due to Customs clearance, International mailings sometimes take 30-75 days to receive.

The first secret word is: 
We

Next hop over to our December Guest Designer:
For your final stop, return to the ScrapThat! Blog to let us know you have completed the hop.
Remember ~ only send the secret sentence to
 tracey@scrapthat.ca

All of us at ScrapThat! wish you and your families a Happy New Year!
We are looking forward to seeing a whole host of new layouts!
Let the scrapping begin!
We can't wait to see what you create!

Thursday, December 27, 2012

Introducing our January Guest Designer ~ Kelly Klapstein


ScrapThat! is delighted to introduce our
January Featured Guest Designer
The Extraordinarily Talented

Kelly is a contributing writer for Canadian Scrapbooker magazine. Not only does she create amazing pages, but she also loves to share her passion through teaching. She was a Featured Instructor at the 2012 Great Canadian Scrapbook Carnival.


Hi there!  My name is Kelly Klapstein, and I’m excited and honoured to be Scrap That’s Guest Designer for January 2013!  I was born and raised in Edmonton, Alberta, Canada, and aside from living and working for about 5 years in Ontario, I’ve always called Edmonton home.  The big blue sky and westerm prairie landscape are an inspiration to me each and every day, although I could do without the frigid long winters! 

I guess you could say I am the daughter of a scrapbooker.  Ever since I could hold glue and scissors in my little girl hands, my mother encouraged me to keep photos and memorabilia from my life in scrapbooks.  I also have my mother’s precious albums from her youth and am using her photos to create heritage pages now. 

My scrapbook style is quite “eclectic”…I enjoy creating fun, playful, cute layouts as much as I do the shabby chic, vintage ones using lots of techniques.  I’ve even done digi layouts but prefer crafting with my hands.  Over the past couple of years, however, I’ve experienced a creative urgency and have started to explore the artistry of this craft with mixed media.  This has led me to design some unique layouts that are very personal and close to my heart.

I truly enjoy sharing what I’ve learned about designing pages and currently teach classes at my local scrapbook store in Edmonton.  I’m also a freelance writer and Education consultant. Teaching is one of my passions, and I used to teach high school English until I had children.  I have three children….Matthew (17), Serena (16) and Mila (12).  My husband and I have been in love since we were 18 and have been married for 23  years. 

One thing I love about the world of scrapbooking is connecting with others and sharing our art…either in person or online.  I have learned so much and met so many wonderfully talented scrapbookers online. It’s an amazing global community where crafters from every country can exchange ideas and encourage each other on their artful journeys.

To get to know me better, feel free to visit my blog www.kellycreates.blogspot.com where you will find some funny family stories and take a peek into my life as a scrapbooker!

Wednesday, December 26, 2012

January "Flakes of Snow" Kit Sneak Peeks


Our designers have been busy creating with our January "Flakes of Snow" Kit. Here are a few sneak peeks of their gorgeous work with this amazing kit:


Be sure to stop back on Friday for our full reveal!! You will want to hop through all of our designer's blogs to see their amazing work and a chance to win our grand prize, a ScrapThat July Main Kit. 


We have a special stop on our blog hop this month offering an additional prize that you won't want to miss!! 

~ See you Friday! ~

Tuesday, December 25, 2012

Merry Christmas!!!


All of us here at Scrap That! Kit Club would like to wish you a very Merry Christmas! Hopefully, this will be a season of reflection, wonderful family gatherings and lots of memories to fill your heart. Some of you may be alone, or away from loved ones this year or even grieving. Please know that our heartfelt prayer is that you will find peace and comfort. 

Thank you so much for being part of us here at Scrap That! We sure do appreciate you! 

Merry Christmas!  

Sunday, December 23, 2012

LOTW-December 23rd

Hi everyone, Amarilys here today to share with you our LOTW! Now, the gallery has been beaming with amazing layouts, cards and projects but one of them stood out.

Help me congratulate Connie Hall, since her layout "Noble Steed" was chosen as LOTW this week!


Her layers, distressing and beautiful picture come together perfectly! Please stop by her layout and leave her some love! Congratulations Connie!! Please send an email to amadrian8@yahoo.com for your LOTW badge code.

Wednesday, December 19, 2012

Christmas Presents by Sandi Smith

Hi everyone....I am sure you are all busy with the hustle and bustle of Christmas which is so very fast approaching. Sandi S here today with an easy little share on how to make some of your own embellies for those Christmas layouts  you will be making with the December ScrapThat! Kit. Here is my example:
Using the coordinating papers in the kit, just cut some random sized squares...perfection not required. Ink the edges.
 Using the Dazzle Gold strips decorate the squares to your liking.
 Using the beautiful trims included in the kit, make bows to add to the tops of your gifts. For one, I just looped some of the Dazzle strips.
 That's it all done....very easy! If you prefer to not fussy cut the tree as I did, just cut triangle for trees from the papers. They look very cute with those presents tucked underneath!
 Wishing you all a Merry Christmas 
and a Happy New Year!
Sandi

Tuesday, December 18, 2012

GD Robin Shakoor ~ Featured December Kit Projects

Today I would like to share the amazing projects created by our December Guest Designer,
Robin Shakoor

I am so excited to share with you the wonderfully Christmas themed December kit which features the beautiful "Turtle Dove" collection by Kaisercraft.

I am delighted to be the Guest Designer for December for Scrap That!  The kit is just beautiful and you will love working with all of the gorgeous embellishments.

Here are a few of my projects . . . . 

"Joy"
Main Kit
I used the Main Kit contents to create this layout of my daughter and our puppy Chance.  I cut the ornaments from the patterned paper in the kit and tied string to them to make it appear as if they are hanging.

 "Enjoy the Season"
Main Kit, EAO Kit
Here I used the embellishment add-on which contained a beautiful chipboard angel.  I painted the angel gold, traced her dress onto patterned paper, adhered it to the chipboard and inked the edges.  For a final touch, I added liquid pearls and a gold ribbon around her neck.

"Enjoy the Season"
Main Kit
I used the Main Kit to create my last layout.  I painted the chipboard bells using acrylic paints and stickles.  The tutorial can be found on the December 10 ScrapThat! Chat Blog Post.

 "Peace"
Main Kit, EAO Kit
My final project is a card.  I painted a gorgeous chipboard ornament and adhered it to my page using dimensional foam adhesive.  I added pearls to the center of the holly for a 3-D effect.  I added liquid pearls to various parts of the image for dimension.

To view more of Robin's gorgeous work,
be sure to stop by her blog,

Monday, December 17, 2012

Tracey G.Tutorial** Snap,Crackle & Pop **

Tracey G. here!
Today I am going to show you how I made the multi-layer crackle effect on my trees in my "Oh,Holy Night" layout below:

The materials I used were:
2 Dusty Attic trees
Hunter Green Acrylic Paint
Holtz distress Crackle paint in Shabby Shutters
Hunter green ink
Ranger clear Crackle Accent
The technique is my spin on techniques I found on the Dusty Attic Blog. When looking for new chipboard treatment ideas, they have tons to offer!
So let's Start:


I also used a similar treatment on the Dusty Attic angel on my "Peace" layout:

 So put your own spin on it and give it a try!
Have a great week!
Tracey G.

Sunday, December 16, 2012

Layout of the Week - December 16 **Connie Hall**

Sarah here and I have the fun (and difficult) task of picking the Layout of the Week this week! There are so many gorgeous creations in the Gallery - but I just had to pick Connie Hall's gorgeous Layout entitled "Family" as this week's layout of the week!

I just love the brick background Connie created and the wonderful wreath design and layered banner! "Family is Love" is such an appropriate sentiment right now. Treasure your family and the precious memories you'll create this holiday season.

Congratulations Connie on creating this week's Layout of the Week - you can private message be for the LOTW badge code for your blog!

You can see more of Connie's beautiful scrapbooking on her blog: http://timestocherish.blogspot.ca/

Saturday, December 15, 2012

December Kit Creations by Sarah Routledge

Sarah here, hoping that you are enjoying a wonderful holiday season! Today, I get to share with you some details and close-ups of my creations with the gorgeous ScrapThat! December Kit.

"First Noel"
Main Kit
This is the layout I created based on Amarilys' beautiful December Sketch! The picture is of my son on his first Christmas Eve in the cutest little reindeer jumper. 

Everything on this layout is from the Main Kit, with the exception of the buttons and the brown/white baker's twine, which are from my stash. I machine stitched a square about 1.5 ins. inside the edge of the die-cut page and then water-misted/scrunched the edges. I also added bits of edge-punched paper as peek-a-boos around the scrunched edge of the die-cut paper.

I love using the kit papers to create embellishments, so for this layout, I created a double-layered, stitched banner and three different sizes of rosettes. I "hung" the rosettes using the red/white bakers twine in the kit and added the holly leaves and berries as the "hanger" for the rosettes. For the banner, I handcut the flags and die-cut the scallops and machine-stitched them together to form a layered banner. Here is a close-up of the rosettes and part of the banner.
~~~~~~~~~~~~~~~~~~~~
"The Best Gift"
Main Kit, EAO, FAO, PAO
This layout was inspired by my scrappy friend Frank Garcia's layout entitled "Temps" and the song "The Best Gift" (which you can find on Barbra Streisand's Christmas Album). I wanted the page to look like unwrapping a gift - the best gift I ever got, my tiny baby boy, who is about 6 weeks old in this photo.

I handmade the large poinsettias on this layout - you can go here to see the tutorial on how I made them. 
The gold leaves and white roses are from Main Kit and FAO and the green spirals are the wires cut from the white roses. I also added additional poinsettia flowers that I picked up in the bargain bins at Michael's. I did a simple paint treatment on the chipboard bells and then added some of the gold border stickers from the EAO to echo the borders I used across the upper portion of the layout. I cut the gold balled wire from the Main Kit into individual  balls with stems to create the gold 'berry' clusters. 
I altered the white roses by smearing them with craft glue and then dipping them into the same mixture of micro beads that I used for the poinsettias. Here is a close-up of one of the altered white roses.
For the bottom portion of the layout, I tore two layers of paper, folded back the edges and secured them with gold 'berry' clusters. The flowers are a mixture of the FAO and flowers from my stash. I also added in a chipboad french horn from the EAO (again a simple paint treatment). The letters for the title are from the ScrapThat! November Kit.
 
~~~~~~~~~~~~~~~~~~~~
"Joy"
Main Kit, EAO, FAO
My final page with the kit - I wanted to go with a lot of silver and gold on this page with a few splashes of colour. Everything got misted with a generous coat of gold mist too! I have to apologize for the quality of the photos of this layout - the gold misting simply does not photograph well!

I started this layout by doing some stamping with two Kaisercraft stamps from my stash - a chicken wire stamp (just visible in the top left) and a postage marks stamp (right side). I used two of the speciality papers, some Prima packaging and some bits of one of the borders off the patterned paper in the layering here. I also added in some Prima Canvas resist pieces from my stash. 
 I used the white flowers from the FAO and the silver leaves and silver balled wire (again creating 'berry' clusters). I replaced the rhinestone cluster from the centre of the larger white flowers with the silver snowflake brads from the Main Kit. You can also see some fussy-cutting of the ornaments from one of the speciality papers.
 I painted the chipboard ornament with white gesso, embossed it with an embossing folder and then brushed it with gold paint. 

~~~~~~~~~~~~~~~~~~~~
Thanks so much for visiting the blog today. I hope you found a little inspiration in my layouts and I wish you all the best during this holiday season!

Thursday, December 13, 2012

Handmade chipboard tutorial by Amarilys

Amarilys here and today I want to share with you a quick tip on how to make your own chipboard!

Supplies:
  • dies: Heartfelt Creations Decorative Metal Fixtures Dies-HCP 725 
  • stamp: Decorative Metal Fixtures PreCut Set-HCPC 3488
  • Cuttlebug machine
  • chipboard or thick cardstock such as the one used in the back of a paper stack or collection
  • archival ink
  • chalk ink (included in the December Kit)
  • Crackle Medium (optional)

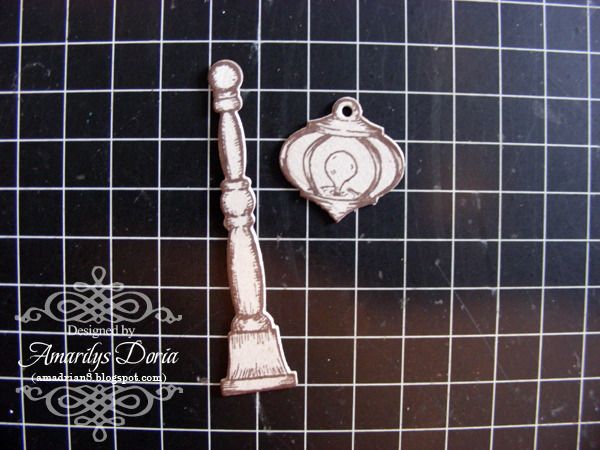
Step 1. Die cut your shape out of chipboard or thick cardstock such as the one used to bind a paper stack.


Step 2. Stamp your image unto the chipboard with archival ink. If you do not use archival it will bleed through


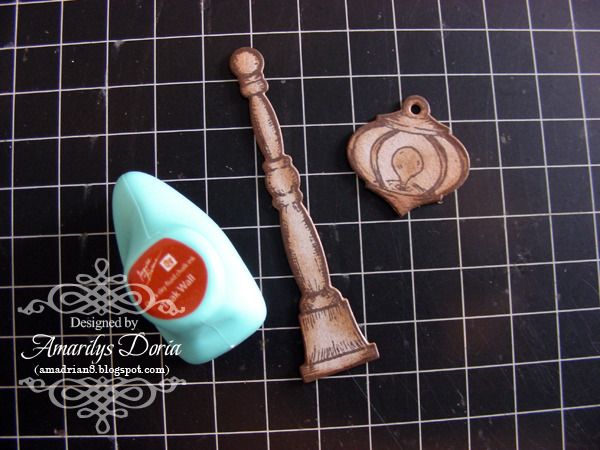
Step 3. In random areas, lightly ink the image to create an antique look.


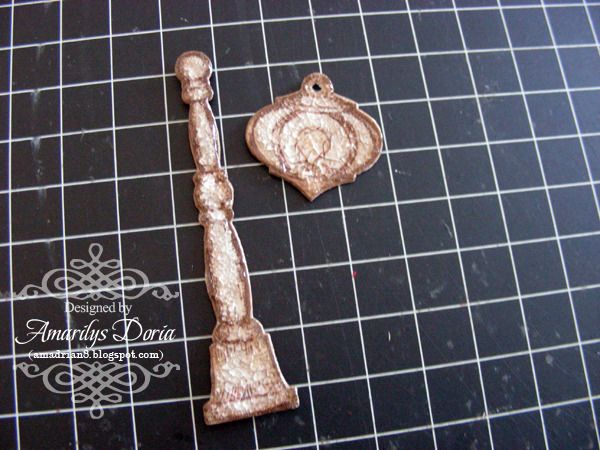
Step 4. Finally, add crackle medium and let it dry.

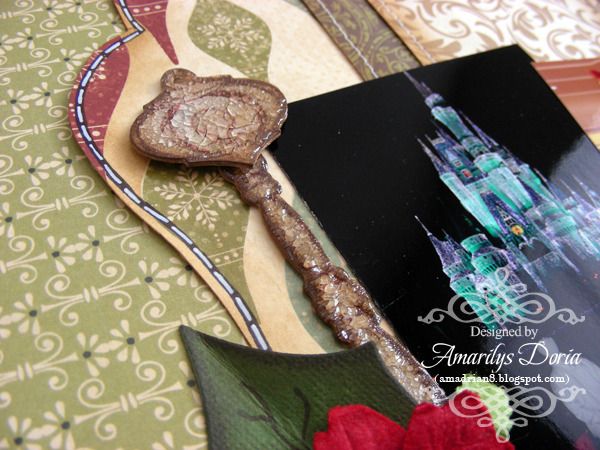
Here's a close up of my finished piece in my layout:


Note: You do not have to treat the chipboard as I did. Once your chipboard piece is finished you can color it with acrylic paints, mist it with glimmer mist or leave it as is. Many designers this month are having chipboard treatment tutorials so I encourage you to try one of those tutorials on your handmade chipboard piece!

Thanks for stopping! I hope that you are inspired to make something with this amazing kit! If you want to see more of my creations, please stop by my blog.

Tuesday, December 11, 2012

December Kit Creations By Sandi Smith


Hi everyone...Sandi S here today to share my creations with the very beautiful December Kit.My first layout is based on Amy's lovely sketch.This month, our sketch challenge is running the entire month of December so be sure to join in. You can find the details here.
 Made from Main Kit and Stash
This photo was taken last year of my sweet girl. I made a textured circle background using a stencil and molding paste, added glitter while it was still wet and then stitched along the design.
 Made with Main Kit, FAO, EAO and Stash.
This photo is from way back in 1976 and it's of my dad, two brothers and me with the cheeky grin! I got a little messy with this one and it is based on this sketch from Keeping the Best. I also used some Elise Flourishes and Flowers from Flourish With a Bling.
I added some gold paint to the background and stamped with a script stamp. I also added some textured leaves( tutorial here) and added some red stickles for some added sparkle. I cut the presents from the papers and embellished with the gold Dazzle strips and some pretty trim.
Made with Main Kit, EAO, FAO and Stash
 This last layout is also made with beautiful pictures from the past. This is again me and my little cousin who died at the age of 14 with cancer....I love those precious photos!I did some punching and lots of fussy cutting for this one. I painted the chippie with gesso and then rubbed on gold paint with my fingers.
My last project is a card. I am not a big fan of card making because I always struggle with it...not sure why! I also used a piece of the beautiful Chloe Olive Green flourish from FWAB behind the poinsettia.I did some random stamping along the edges and added some gold paint!
That's it for me and I hope you have a great week.!
Sandi