Saturday, September 15, 2012

September 15th Color Challenge

Hi everyone....Sandi S here and I will be hosting the challenge this month.
The September Kit was my favorite thus far(I say that every month) and I loved the soft pastel colors in the Beautiful Ladies Diary papers. So lets have a color challenge this month!!!!
 
This Challenge is open to EVERYONE!!!!You do not have to be a kit subscriber or use the September kit to join in on the fun!!Oh yeah...almost forgot...you can also use BLACK, WHITE or CRAFT.

You can check out all the details HERE.
Here's one for inspiration made with the September Kit.
There are of course a few rules:
 
~Your project has to be new for this challenge and posted here in this thread as well as uploaded to the gallery.
 
~ Challenge closes on September 30th and the winner will be chosen by Random.org and posted here in this thread on the 1st.
 
~ Most importantly.......Have fun!
Get Scrapping...can't wait to see your creations!!

Friday, September 14, 2012

Introducing ScrapThat! DT Coordinator ~ Tracey Sabella

ScrapThat! would like to welcome our new 
Design Team Coordinator ~ Tracey Sabella!

I am so excited to be part of the ScrapThat! team!!

I live in Ohio with Gary, my amazing husband of 30 years. Family has always been an important part of our lives with our four children, Joseph, Grace, Elizabeth and Maria. Our family is growing with two weddings in a year! Joseph brought us Rachel in December and Elizabeth will be marrying Andrew in October. Our children have had quite a diversity of interests over the years, so I never want for photos to scrap. After home educating for 19 years, our youngest, Maria, entered our local public school for her final two years leaving me with more time to create.

As much as I love my family, my first love is my Savior, and my faith is often reflected in my work.

I began scrapbooking when our church started a monthly scrapbook night in February 2007. What started out as a goal to archive our family activities, soon became a wonderful artistic outlet. I enjoy the creative process!  I peruse flea markets and rescue things from the trash, so you just never know what might pop up on one of my pages. My go to Scrapbook style these days is shabby chic mixed media.

I am so excited that Kaitlyn has extended the opportunity for me serve as the Design Team Coordinator. It is such an honor and blessing to be a part the ScrapThat! Team.

WELCOME Tracey, we are so glad to bring you aboard!!!
For more on Tracey, please visit her blog:
Garden Of Grace

Layered Background Tutorial by Marilyn


Hello everybody!!!  Marilyn Rivera here to show you how I made this layered background in my page "A Beach Day" that I made with the ScrapThat!-September Kit- Victorian Dream.


This is how I made it....

Materials...
1- Your background paper
2- Some strips 1 1/2" inches by 12" inches in different papers pattern
3- Distressing tool
4-A Border Puncher

Punch some strips in cardstock.

Distress all the pattern papers strips for one side.

It should look like this...

Now distressing ink in each strips

Now go and start gluing the strips from bottom to top

It should look like this...

Once you have glued all the strips then cut the excess of paper in both sides of the page. I added some 3-d dots to create dimension.

And this is the result....you can add corrugated or a zipper between the strips to add more texture.
Try it you will have fun!!!
Until next time!!
Marilyn Rivera
http://marilynrivera.blogspot.com/

Thursday, September 13, 2012

Keren's September Kit Creations


Keren here to showcase my creations with the Victorian Dream September kit. I've already shown you my tutorial last week on how to make that beautiful dress for the Dusty Attic Dress Form. Today I'm showcasing my layouts in more detail.

I also want to announce that September is my last month with Scrap That!. These past 6 months have been amazing and I enjoyed creating with these kits and meeting new people. Its been a blast!!

 
Here is the layout I made using the sketch for the monthly challenge. If you want to participate click here

 This layout was made predominantly with he main kit. I made my own flowers out of paper. I used the crystal leaves from the EAO and I added a black feather and a chipboard title from my own stash. I also used gesso and black paint to give the layout some texture.


Here is my second layout. I used a baby picture of my daughter. I fussy cut the clocks and the flowers and added them to the layout. I made my own textured background with fiber paste and paint. All the products are from the main kit except the Prima flower from the EAO.


For my third layout I use a picture of myself!! I layered lots of cut-out papers over some dripping textured paint.
All of the products are from the main kit except the flower and branches.


I hope you enjoyed my layouts. You can also visit my blog to see more of my creations

Dusty Attic - Three Days Left to Order


Have you placed your Dusty Attic order yet?

You have until Saturday, September 15 to place your order.

Wednesday, September 12, 2012

ScrapThat! is looking for Designers to join our Team!

ScrapThat! ~ Canada's Best Kit Club is looking for  Designers to join our Team!

Design Team members receive:
1. FREE PRODUCT - A full monthly kit plus the embellishment add-on kit, valued at well over $50 retail. 
2. GENEROUS DISCOUNT - A 30% discount on all product purchases that will fit in the box with your kit to ship free of charge!
3. FAME & GLORY - Your photo and bio on our Design Team page!

What we ask of you:
  •    A 6-month term
  • Design exclusivity to ScrapThat! Product manufacturer sites are fine, but we must be the only online store/kit club that you design for.
  • You must have a blog and Facebook account and update it regularly each week including posts about projects you’ve created from the kit, design tips etc. We ask that you also have links to our site on your blog and any other sites you are involved with where allowable.
  • Minimum of 3 projects created every month with the kit.   One layout must use the main kit contents only, (no items from the add on kits).  90% of each project must contain kit contents.
  • Post your 3 kit designs, plus an additional two projects of your choice (made with your stash) in our gallery every month as well as to one other large gallery site, either www.Scrapbook.com  or www.TwoPeasinaBucket.com.  Postings on these sites must include *ScrapThat! Kit* in the title line.
  • Projects must be well photographed; standard size we are using on the website is 640 x 480 rectangular & horizontal…no text or frames please. Have cropped and ready to be uploaded on our site (and your blog) the last Friday of each month.
  • Submit your kit design work for publication when applicable to open calls. Where possible, credit must always be given for projects created using our kits.
  • Input something into the Community forum and gallery. This is quite possibly the most important thing! We have a terrific on-line community and our members are of the utmost importance to us, so this is huge!

Should this be of interest, kindly apply and submit a link to your blog, along with 3 of your favorite recent layouts by September 23, 2012
e-mail: kaitlyn@scrapthat.ca. 

Please note: at this time, this opportunity is only open only to those applicants residing in North America.

Tuesday, September 11, 2012

Sandi C's September Kit Creations

Are you ready to see some of my kit creations?!! 

Layout using the Main kit and personal stash

On my first layout, I've used a Prima gate stencil and some molding paster for a bit of fun. Then added some fussy cut flowers from the Ladies Diary paper along with a favorite Dusty Attic branch that I snipped in to 3 pieces. I've used the ivory Petaloo flowers from the kit as well as some small Primas from my stash. I love love love the yarn that Kate put in the kit this month and now I want to go buy some more! Didn't it just make the yummiest bow?  This layout is based on a sketch by my sweet friend and co-leader, Leah Schaeffer of Stuck on U Sketches.

Here are a few close-ups. 


Next .. 
Layout using the Main kit, EAO and FAO 

I thought I would do something a bit different and went with one of my dgd's horse photos again.  I thought that this Victorian lady might have a few horses in her life! I've covered my paper with some gesso to really make my photo and the fussy cut images pop. The Prima flower is from the EAO abd the small Prima roses are from the FAO. Again, I've used a  Dusty Attic piece that I painted multiple colors. It is really more Rust in color than Red. Of course, you can see that I've used a Martha Stewart PAP that I've neglected for a bit. 


Then .. 


 I decided I would create something besides a layout this time and came up with this adorable shoe using the Main Kit and the FAO.  I will be presenting a tutorial on this shoe during the month of September. Stay tuned! 


Layout using the Main Kit, EAO and FAO. 

I wanted to see if I could get a "guy" layout out of these Ladies Diary papers and came up with this  page of my dgs, Isaac. He's young enough to still get away with a few flowers, right? Anyway, this layout is based on the wonderful sketch provided by above by DT member and sketch designer, Amarylis Doria. It was really fun layering my papers and using the gorgeous doily from the kit, along with some cool Prima Bling and Zva and Petaloo blooms! I also snuck in a doily flower. Tutorial coming up on that in October! 


and lastly .. 
Card using Main Kit only along with personal stash

 .. yes, I know... so many projects and I still have lots of product left!
  I also put together this really great card and love how it looks! 

I've enjoyed sharing my kit creations and hope you have as much fun with your kit as I did mine! 

Monday, September 10, 2012

ScrapThat! is looking for a Video Coordinator to join our Design Team!

ScrapThat! ~ Canada's Best Kit Club is looking for a Video Coordinator to join our Design Team!
Design Team members receive:
1. FREE PRODUCT - A full monthly kit plus the embellishment add-on kit, valued at well over $50 retail. 
2. GENEROUS DISCOUNT - A 30% discount on all product purchases that will fit in the box with your kit to ship free of charge!
3. FAME & GLORY - Your photo and bio on our Design Team page!

What we ask of you: 
  •     A 6-month term
  •   Exclusivity to ScrapThat! Product manufacturer sites are fine, but we must be the only online store/kit club that you design for
  •    You must have a blog and Facebook account and update it regularly each week including posts about projects you’ve created from the kit, design tips etc. We ask that you also have links to our site on your blog and any other sites you are involved with where allowable 
  •  Minimum of 3 projects created every month with the kit.  One layout must use the main kit contents only, (no items from the add on kits). 90% of each project must contain kit contents
  • A video tutorial demonstrating step-by-step instructions on how to create one of your projects, including any design tips or techniques used in your project
  •  Post your 3 kit designs plus an additional 2 projects of your choice (made with your stash) in our gallery every month as well as to one other large gallery site, either www.Scrapbook.com  or www.TwoPeasinaBucket.com.  Postings on these sites must include *ScrapThat! Kit* in the title line
  •   Projects must be well photographed, cropped and ready to be uploaded on our site (and your blog) the last Friday of the month
  •   Video tutorial must be ready to upload to the ScrapThat! You Tube account, our NING community, and Design Team blogs by the third Monday of each month
  •   Participation in our monthly blog hops and contests is required
  •   Community forum and gallery participation. This is quite possibly the most important thing! We have a terrific online community and our members are of the utmost importance to us, so this is huge!
  •   Keep up-to-date on design and product trends in order to contribute product ideas to include in the monthly kit and ideas of how to generate more sales
  •   Submit your kit design work for publication when applicable to open calls. Where possible, credit must always be given for projects created using our kits
Please submit a link to your blog, along with three of your favorite recent layouts, and a video sample to: kaitlyn@scrapthat.ca by September 24, 2012.  

This opportunity is open to applicants residing in North America.

Sunday, September 9, 2012

September Reveal Blog Hop Winner

We have a winner for our September Reveal Blog Hop.

.  .  .  .  .  .  . Drum Roll Please .  .  .  .  .  .  .

And the winner is ~ Debbie Rybolt.

Congratulations Debbie!!

Please email your address to:

tracey@scrapthat.ca

Friday, September 7, 2012

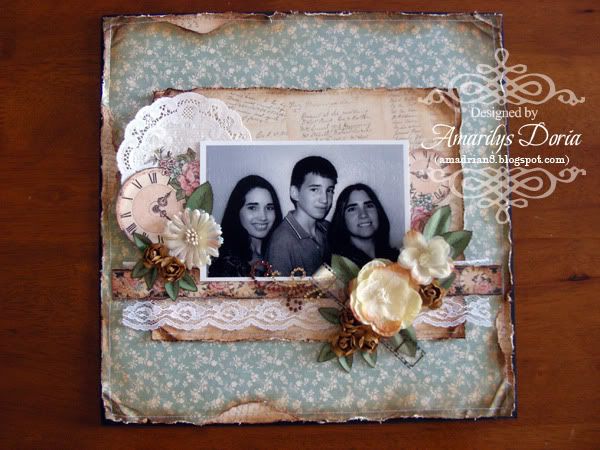
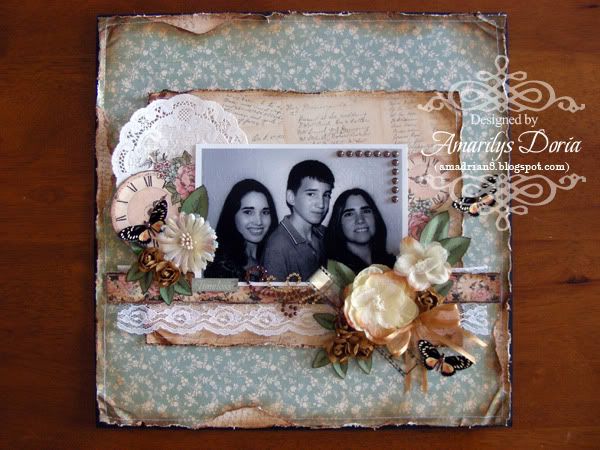
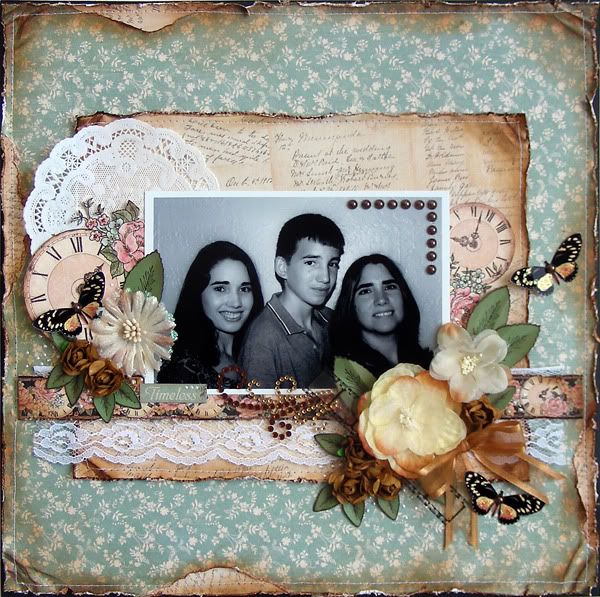
BAP with Amarilys

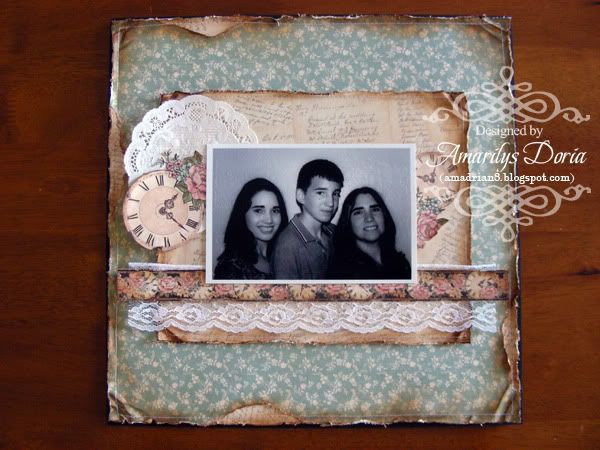
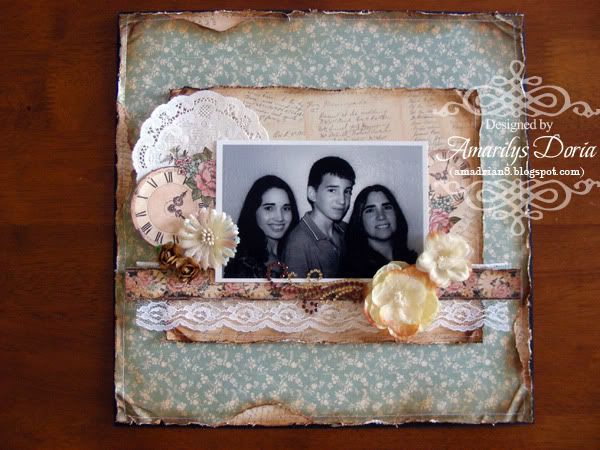
Amarilys here and today I want to share with you a BAP. Now, I took a lot of pictures along the way so bear with me. I didn't want you to miss anything! :)

So, let's get started!


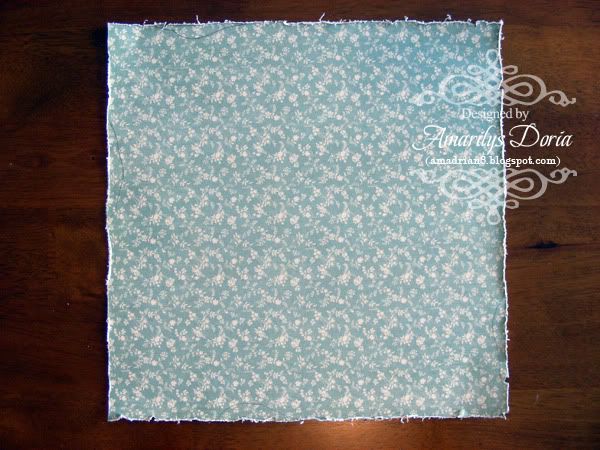
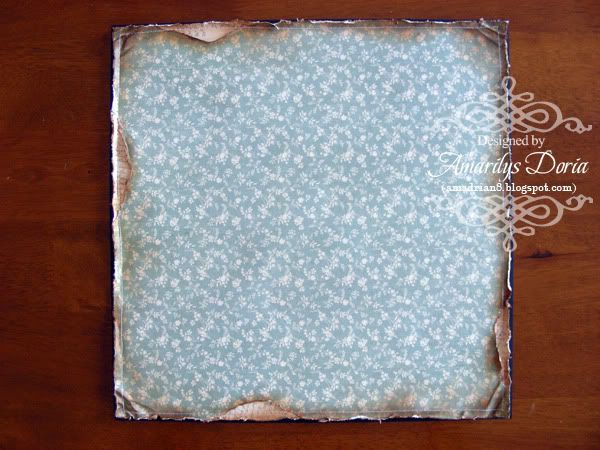
Step 1. Distress your pattern paper with the Tim Holtz distressing tool.


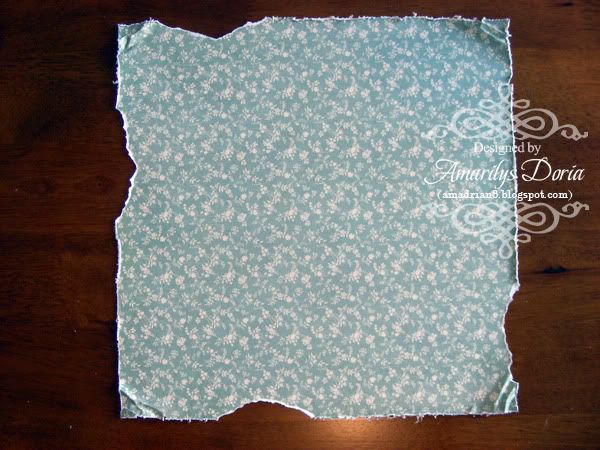
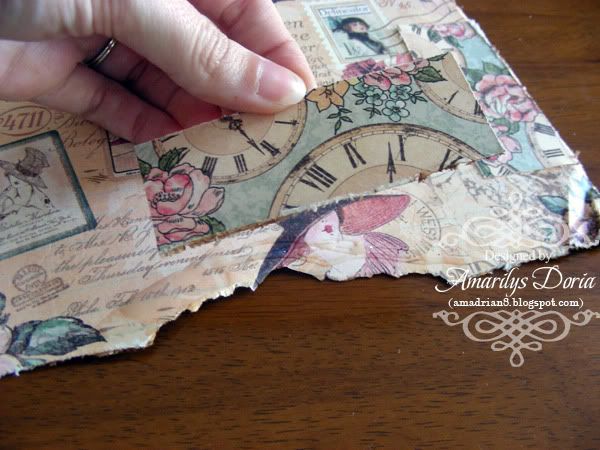
Step 2. Tear random areas around the page and crumble with your fingers the corners.


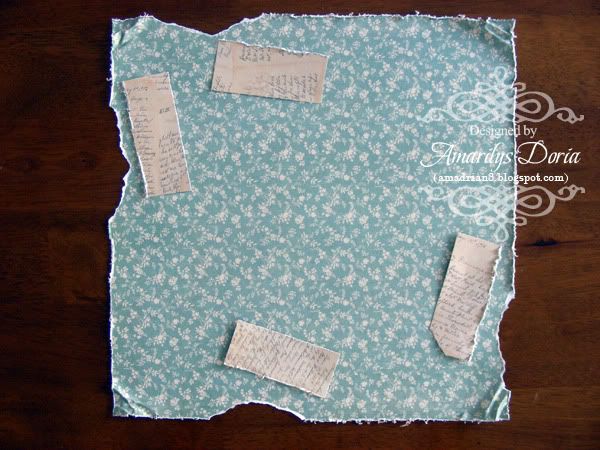
Step 3. Trim a 12"x1.5" strip of typography paper, distress the edges with the tool and cut to size to fit under the torn areas from the blue background paper.


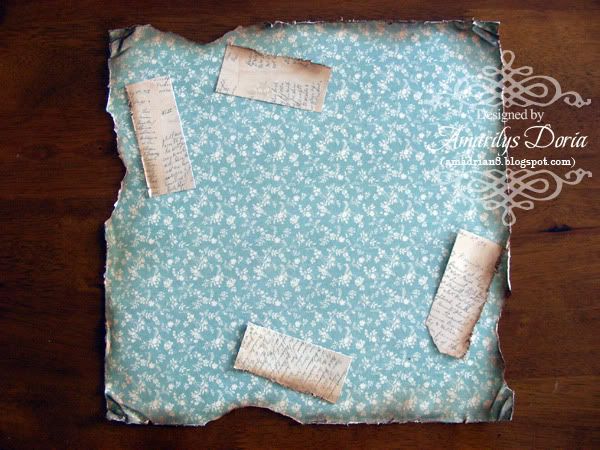
Step 4. Using the Tim Holtz blending tool and Vintage Photo distress ink, ink the edges of all the papers.


Step 5. Adhere the strips of typography papers to the back of the blue paper, making sure that the sides alight correctly.


Step 6. Adhere your pattern paper unto a black cardstock and machine stitch the edges.


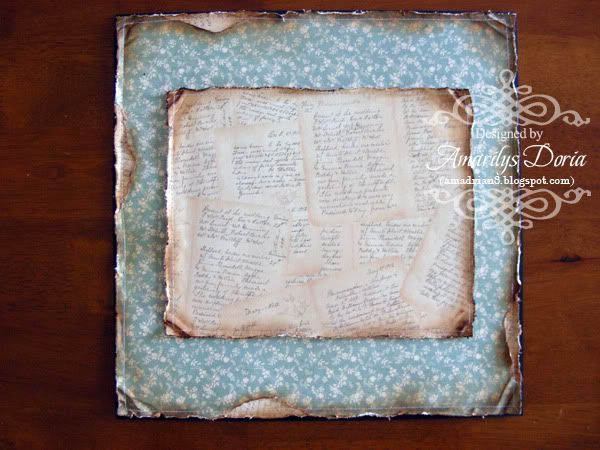
Step 7. Trim the same typography paper to 9"x7.5" and repeat the distressing process that you did for the background on this paper too. Machine stitch this layer unto the center of the layout.


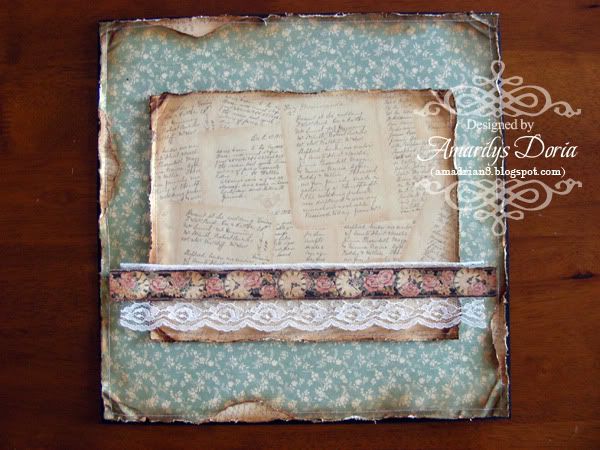
Step 8. Add lace and a strip of pastern paper over the typography paper as shown.


Step 9. Add your black and white photo over the center and tuck in a white doily and two fuzzy cut clocks on the left and right side of the picture.


Step 10. To start forming the clusters, add a few larger flowers to the bottom right corner and to the left of the picture. Add a bling flourish under the picture as well.


Step 11. Add the smaller flowers now as well as the film to the right side of the picture.


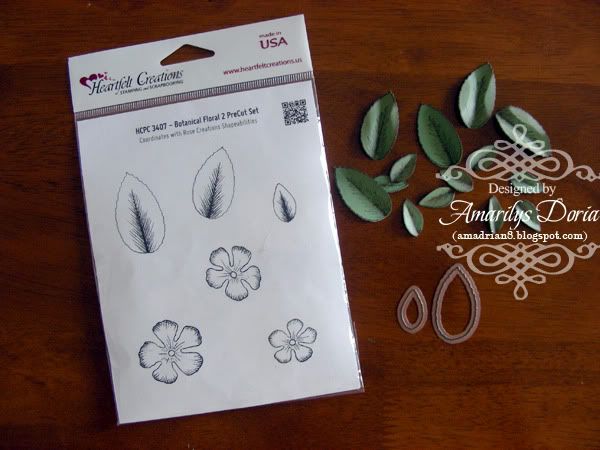
Step 12. Die cut, stamp and shape a bunch of green leaves using the Rose Creations Shapeabilities and the Heartfelt Creations Botanical Florals 2 Precut Stamp Set.


Step 13. Add the leaves to the cluster to fill the area.


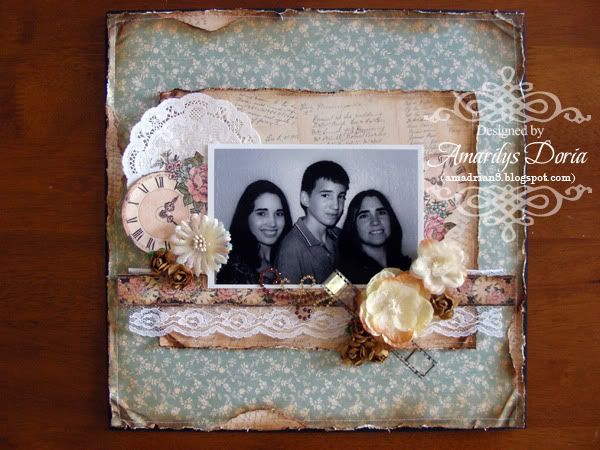
Step 14. Add a bow to the right corner cluster, a few butterflies randomly around the page, and a title sticker on the bottom left side of the picture. Add a strip of pearls as a corner on the top right corner of the picture. Finally, add stickles to the fuzzy cut flowers on the clocks, and on the butterflies.

Here's my finished layout:


Thanks for stopping! I hope that you are inspired to make something with this amazing kit! If you want to see more of my creations, please stop by my blog.