
Monday, December 10, 2012

Embellished Chipboard Tutorial ~ GD Robin Shakoor

   Today we would like to share a tutorial by our talented Guest Designer, Robin Shakoor.
She shares her tips and techniques used to create the amazing chipboard bells from her gorgeous 
"Enjoy the Season" layout.


Hello everyone!

This is Robin Shakoor, and I am delighted to be the guest designer this month.  I would like to share the steps I took to embellish the chipboard bells on my layout.

Place large bells on a paint safe surface before you begin to paint.

Paint the main portion of the bells using a red glaze acrylic paint as pictured below.

The chipboard has lines which serves as the perfect guide when embellishing your chipboard.

Next you will paint the center band and the inside section of the bells using a gold metallic paint.

Using a silver glaze acrylic paint, paint the round portion of the bell and the portion of the bell which attaches to the holly leaves.

Paint the ribbons using an antique white acrylic paint.

Here is a close up of the ribbons.  Feel free to add glitter glue, etc for extra texture.

Using a silver glitter glue, paint the round portion of the bell to give it a beautiful sparkle.

Here is the finished bell with the beautiful sparkle of the glitter glue.

Paint your holly leaves using a metallic green paint.  Once completed, you will add three pearls to the design of the chipboard.


I used a pointed tool to adhere small pearls to my design.
 
Thanks so much for joining me today.  
Robin

Be sure to drop by Robin's blog, Designs by Robin, to view more of her amazing work. 

January Kit Creations with Tracey G.

 
I hope everyone has checked out the Gorgeous,BoBunny filled January ScrapThat! kit. Here are some of my layouts:

So here is what I made with just the main kit:
 
 
 The pic is my daughter several years ago,playing under the tree. I made the flowers using my McGill Lily punch, lots of glamour dust and perfect pearls.

See the bottle cap tucked in there? I added a sticker and topped with glossy enamel.

This is one inspired by Amy's sketch:

 
This is my newlywed friends in their Mary and Joseph roles during our church's Living Nativity. Since this is also their first Christmas as a married couple, I thought "The First Noel" was a fitting title.


Using some Dusty Attic (not in the kit but available during special orders from ScrapThat!), I coated it with copper leaf,then highlighted random areas with Patina Rub-n-Buff. I finished it off with a Ziva pen in copper. You can see I went for a deep distressed look as I loved the contrast of the "wood" with the "night sky" and the rustic nature of the nativity scene.
 

 Here is my 3rd layout of my Neice, Vivi, enjoying her second winter, but first time playing in the snow !
 
This was inspired by a sketch from Scrap 365 magazine.
 I used snow-tex and glamour dust for the
sparkly snow and posted a BAP on this page on the blog for Jan 2 if you want to see all the details.
Thanks for stopping by and can't wait to see what you create!


Sunday, December 9, 2012

LOTW December 9 **Laura Gilhuly**

Hi everyone! Tracey G. here.
This is my first time selecting Layout of the Week and you ladies don't make it easy!
 There were several that touched my heart and amazed me with artistic talent.
 My final seclection does those two and more !

Growing Too Fast


I chose Laura Gilhuly's "Growing Too Fast" as this week's LOTW.
I love the textures and mix of colors she uses to highlight this sophisticated black and white portrait of her oldest son. As a parent of boys myself, it just struck a chord that I am sure every parent feels as their children grow older seemeingly overnight. Laura's layout has captured this emotion so beautifully! See more details on her blog, http://angelbearscraps.blogspot.com/
Congrats, Laura! Message me on the Ning site (Tracey Gregory) for your Blinkie Badge of Honor !

Call for Designer/Social Media Coordinator

ScrapThat! ~ Canada's Best Kit Club is looking for a Designer/Social Media Coordinator(must be able to maintain the ScrapThat! Facebook page and Pinterest Account) to join our Design Team!
Design Team members receive:
1. FREE PRODUCT - A full monthly kit plus the embellishment add-on kit, valued at well over $50 retail. 
2. GENEROUS DISCOUNT - A 30% discount on all product purchases that will fit in the box with your kit to ship free of charge!
3. FAME & GLORY - Your photo and bio on our Design Team page!

What we ask of you: 
  •  A 6-month term exclusive to ScrapThat! Product manufacturer sites are fine, but we must be the only online store/kit club that you design for.
  • Be responsible for taking good quality pictures of the monthly kits and add-ons.
  • Make regular posts to the ScrapThat! Facebook Page.
  •  Upload Monthly Kit Creations to Facebook and Pinterest.
  •  You must have a blog and Facebook account and update it regularly each week including posts about projects you’ve created from the kit, design tips etc. We ask that you also have links to our site on your blog and any other sites you are involved with where allowable 
  •   Minimum of 3 projects created every month with the kit.  90% of each project must contain kit contents. One layout must use the main kit contents only, (no items from the add on kits).
  •  Post your 3 kit designs plus an additional 2 projects of your choice (made with your stash) in our gallery every month as well as to one other large gallery site, either www.Scrapbook.com  or www.TwoPeasinaBucket.com.  Postings on these sites must include *ScrapThat! Kit* in the title line
  •  Projects must be well photographed, cropped and ready to be uploaded on our site (and your blog) the last Friday of the month.
  •  Participation in our monthly blog hops and contests is required
  •  Community forum and gallery participation. This is quite possibly the most important thing! We have a terrific online community and our members are of the utmost importance to us, so this is huge!
  •  Keep up-to-date on design and product trends in order to contribute product ideas to include in the monthly kit and ideas of how to generate more sales
  •  Submit your kit design work for publication when applicable to open calls. Where possible, credit must always be given for projects created using our kits
Please submit a link to your blog, along with three of your favorite recent layouts to: kaitlyn@scrapthat.ca by December 31, 2012.  This opportunity is open to applicants residing in North America.

Friday, December 7, 2012

Chipboard Angel Tutorial by Tracey S.

It's Tracey S. here to share a tutorial with you for the chipboard angels I created for my "Sweet Angel" page created with the December ScrapThat! Embellishment Add On (EAO) Kit. These angels are just so lovely and perfectly pair with the gorgeous Kaisercraft Turtle Dove collection.


Supplies:
~ FabScraps chipboard angel from the ScrapThat! December EAO Kit
~ Selection of paints including gold for wings and horn, skin tone for face/hands, and color of choice for hair.
~ Super fine glitter – I used Glitter Ritz
~ Distress Crackle Paint ~ Clear Rock Candy
~ Distress Ink ~ Frayed Burlap and Tattered rose or any ink in a light antique color and for the angel’s blush
~ Mix’d Media Inx ~ Jasmine
~ Mod Podge ~ Gloss
Not pictured
~ Gold Metallic Dazzle Thin Line Strips from December EAO Kit


Step 1: Start with your bare chipboard pieces. Plan your page arrangement so you know which side(s) to paint. I painted two angels facing each other, so my photos may look like they are in reverse at times, since I didn't photograph the same one throughout the process. :-)

Step 2: Paint the wings with metallic gold paint. Immediately while the paint is still wet, sprinkle with supper fine glitter, tap off excess and set aside to dry.

Step 3: Paint horn using gold metallic paint and hair the color of your choice. Set aside to dry.

Step 4: Use a small paint brush to apply Mix'd Media Jasmine ink on the dress. Of the white inks I've tried out Donna Salazar's Jasmine gives the best coverage by far. The reason I used ink here rather than paint is that I wanted a vintage look with bits of the chipboard showing through. You could also use antique white paint. 

Step 5: Apply Clear Rock Candy Distress Crackle Paint onto dress only. I put down a dollop of distress paint and spread it out with my finger, but if you prefer a brush, that would work too.  Set aside. It will form cracks as it dries. 

Step 6: When the crackle paint is completely dry, gently rub Frayed Burlap Distress ink into the cracks. Then brush a coat of gloss Mod Podge or other sealant of your choice over crackled dress. (I have found that unsealed crackle has a way of flaking off.)

Step 7: Paint face and hands with skin tone paint. If you are like me and don’t have a skin tone paint in your stash, try mixing antique white and just a touch a brown and pink or red.  Once dry, add blush by rubbing on a small bit of pink ink. 

Step 8: Cut a small section of one of the Dazzle strips and apply to the neckline. Fine gold cording could be substituted for the Dazzle strips, or it could be left off. 

Once again here she is on my "Sweet Angel" page. 


Even if you don't have one of these lovely angels, you can use the crackle or glittered paint on any chipboard piece. 

We are currently accepting new Kit Club Members.  For details please stop by our ScrapThat! Store.

Thursday, December 6, 2012

ScrapThat! Kit December Creations by Amarilys Doria

Amarilys here today sharing with you the projects that I made with the December Kit "Memories..."

My first layout is based on my sketch for ScrapThat! December Kit.
http://api.ning.com/files/C7oAh9snFqNJA8e-g6THzgNZ6YiGhoR*Ptd0*KlOHYHdjVKo5sFv4eqpN89EMVUkVYubIOIHaDUv0CvRV37nCYyv4WRUn4Qv/sketch_amarilys_100December.jpg
Everyone is welcome to participate, all entries due by December 30th. (NOTE: Due Date has been extended from the 15th to the 30th this month)


I used the Main Kit and The Embellishment Add On for this layout. The picture was taken last year during Christmas Eve dinner. I mirrored the sketch to suit my picture better.

Here are a few close ups:


My second layout is based on Kaisercraft November Saturday Sketch #1:

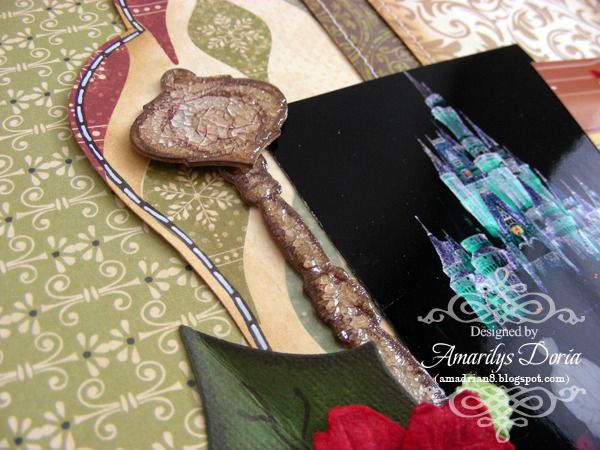
I used the Main Kit only for this layout. The pictures were taken last year during Mickey's Very Merry Christmas at the Magic Kingdom. I handmade the leaves and the light fixture chipboard. Come back later this month and I'll show you how I made it!

Here are a few close ups:


For my last project, I decided to make a non-Christmas project. 

I used the Main Kit only for this gift set. I made an address book, which is actually an altered mini notepad, and a matching card for a friend who moved away. I had everyone add their mailing address on the contact pad for her to keep during the goodbye party. 

Here are a few close ups:
Card-
</span><span style=

Address Book-
Photobucket

Inside
Photobucket

Back
Photobucket

Featuring Kaisercraft's "Turtle Dove" line, this December Kit combines elegant vintage images with classic Christmas colors, so whether you prefer shabby, classic or vintage style pages ~ you can do it all with this kit! Included are poinsettias and holiday leaves from WOC and Green Tara, multiple ribbons from May Arts, Christmas chippies from Fabscraps and more! The Prima flowers in the add-on are such a great mix of textures from neutral to blingy! You can find the December Kit "Memories..." on the ScrapThat! Kit Page.

Thanks for stopping! I hope that you are inspired to make something with this amazing kit! If you want to see more of my creations, please stop by my blog today!

Wednesday, December 5, 2012

Frosted Poinsettia Tutorial


Sarah here with a quick and easy-peasy tutorial to create a beautiful frosted poinsettia!

Here is what you'll need:
  • Poinsettia Flower Die (or other flower of your choosing - this will work with any flower)
  • White Craft Glue
  • Diamond Dust
  • Microbeads (Optional)


STEP 1:
a.) Cut out your flowers.
b.) Mix together Diamond Dust and Microbeads (if using Microbeads).
STEP 2:
a.) Gently fold each edge of the flower petals upwards.
b.) Glue together the layers of your flowers, offsetting the petals.
STEP 3:
Outline the edges of each petal and the flower centre with white craft glue.
STEP 4:
Sprinkle mixture of Diamond Dust and Microbeads onto flower, shake off excess.
And that is it - like I said, quick and easy. Here is another view of the finished flower.
And here is the layout I used these frosted poinsettias on - made with the ScrapThat! December Kit.
Thanks for stopping by the blog today. If you give this little tutorial a try, be sure to leave a comment with a link to your project - I'd love to see what you do!

Tuesday, December 4, 2012

Tracey G.s December Kit Creations

Hi! Tracey G. here!
I hope you have had a chance to check out ScrapThat!s beautiful December Christmas themed kit. Here are some details on my creations:
Here is my first layout, using only the goodies from the main kit:

 
I made the snowflakes in the background with molding paste and a snowflake stencil from Wal-mart. I sprinkled in some Glamour dust while it was still wet for some extra sparkle. The hanging ornaments were fussy cut and embellished with some pearls and snowflakes also in the kit. I undid the gold ribbon for a looser look. The bells were embossed and then crackled. The pic is my daughter from last year's photo shoot. She is the only one who enjoys them!

My second Layout,using the add-ons, is based on Amarilys' gorgeous sketch:


The pic is from the Radio City Music Hall's Christmas show in New York City. The final nativity scene is so powerful and beautiful. The trees are Dusty Attic from my stash. ScrapThat! places orders periodically-great opportunity to pick up some new pieces! I will be giving a tutorial on how I treated the trees to the multiple layers of color and crackle. The angels were distressed to give them a more vintage look.

My third layout is also a combination of the main kit and the add-ons,with the doilies from my stash.

Aren't these Prima flowers stunning? The Dusty attic pieces here are both from the kit. For the candle, I embossed the pewter piece, painted the candle with distress paint, tapped glamour dust into the clear embossing on the flame and use a white glossy enamel on the melted candle section. I like the dimension it took on. Lots of water distressing with shimmery watercolors and some random punching. The pic is my sweet niece Vivi from Thanksgiving day and yes, that is a princess dress she is wearing. It's not just for ballrooms anymore!

Thanks for stopping by, and I hope I inspired a little creativity! Be sure to stop by the ScrapThat! Gallery to see what the rest of the talented design team has created with this kit!

Monday, December 3, 2012

Blog Hop Winner, Sponsoring SEM Challenge, Announcements

ScrapThat! would like to thank each of you who participated in our December Blog Hop. Our winner selected by Random.org is:

Ava Gavloski

Congratulations Ava!!
You have three days to claim your prize.
Please send your mailing address to tracey@scrapthat.ca

*** December Kit Available
for Purchase***

The December "Memories . . ." Kit and Add-Ons are now available to purchase in the ScrapThat! Store for non Kit Club Members. Be sure to get yours before they are gone! 

If you would like to be a subscriber so you don't miss one of these beautiful kits, we are currently accepting new Kit Club Members.  For details please stop by our ScrapThat! Store.
 
*** Challenge Announcement***

We will be holding just one Challenge this month. Amy's gorgeous Sketch Challenge. And, we will be extending it until December 30, so you have the entire month to complete and post your project. The winner will be announced on December 31. Be sure to check out the details here. 

With everyone enjoying the family time and decorating the holidays bring, we will not be holding a Design Team Challenge in December, but be sure to come back in January for a great new challenge.

***ScrapThat! Sponsoring Scrapping Everyday Miracles Challenge***

ScrapThat is excited to share that we are sponsoring the December Challenge over at the Scrapping Everyday Miracles blog.  

A little about Scrapping Everyday Miracles [SEM]:

"Here at SEM we want people to see that God is working in their lives all around them. That everyday is full of miracles if we just take the time to see them. It is the little things that sometimes we don't take the time to notice, but He is standing right there saying, "Here I am." As times are hard and we may feel ~ where is God... where are the blessings... why is this happening to me... If we take the time to stop, sometimes the littlest thing can change your perspective... can give you the hope to keep going. As we complete challenges it is a chance for followers and the DT to spend time with God as we scrap... talking to Him and asking Him what He wants you to see... and what He will being to mind when it comes to asking Him what He wants you to see... and what He will bring to mind when it comes to the theme of the challenge."

This month’s challenge theme is to scrap where you find joy in this holiday season.
The scrap twist is to include glimmer and/or sparkle on your layout.Mists, glitter and stickles are some ideas. Make it sparkle for the season!
There are so many ways to experience God’s joy in this holiday season! Think of the beauty in the carols, magic in the lights and peace in the falling snow.

So what brings you joy? Is it special traditions?

Decorating the tree? Baking cookies with the kids?
Time spent with family and friends?

SEM will choose 3 projects to be featured on the SEM blog .
One lucky winner will recieve  ScrapThat's September Kit, "Victorian Dream." This beautiful kit features the elegant Graphic 45' line "A Lady's Diary.
 
**Winner will pay actual shipping costs for sending the kit from Canada. 
**Shipping costs will be invoiced via PayPal unless you are a kit member, then your prize will be shipped with your monthly kit.
Prizes won during the month will be mailed out the first week of the following month.
Due to Customs clearance, International mailings sometimes take 30-75 days to receive. 

Winners will be announced Jan 5, 2013 

Come click over to SEM to get all the details and see the inspiration creations from the DT !


Sunday, December 2, 2012

Project of the Week (LOTW) Dec 2nd

***If you have arrived for the ScrapThat! December "Memories . . ." Kit Reveal and Blog Hop, please go here. You have until midnight tonight (Sunday) EST to complete the hop.***

Now for Sandi Clarkson's gorgeous LOTW Pick:

There are so many great projects in the gallery this week that choosing just one is really hard!!! However, I've chose a "project" this time instead of a layout because this just really stood out for me as something I would like to do during the holiday season.

Please congratulate Karolina Wyciślik on her awesome box which I am choosing as Project of the Week!
       You can visit here blog for details HERE.
 Karolina, message me here on the Ning site (Sandi Clarkson) for your LOTW blinkie.