


 |
| Hello!! Marilyn here to show you how I made the lace layer for this page. I cut the circle like the mat for my photos and used the negative of the cardstock to make the layers. It's very simple and I will show you how.... |
 |
| Cut the circle. |
 |
| Here the circle and the negative. |
 |
| This is what we are going to use. |
 |
| You can use any border puncher. |
 |
| Start punching around the hole. |
 |
| Then when your scissors cut straight... |
 |
| and punch again... |
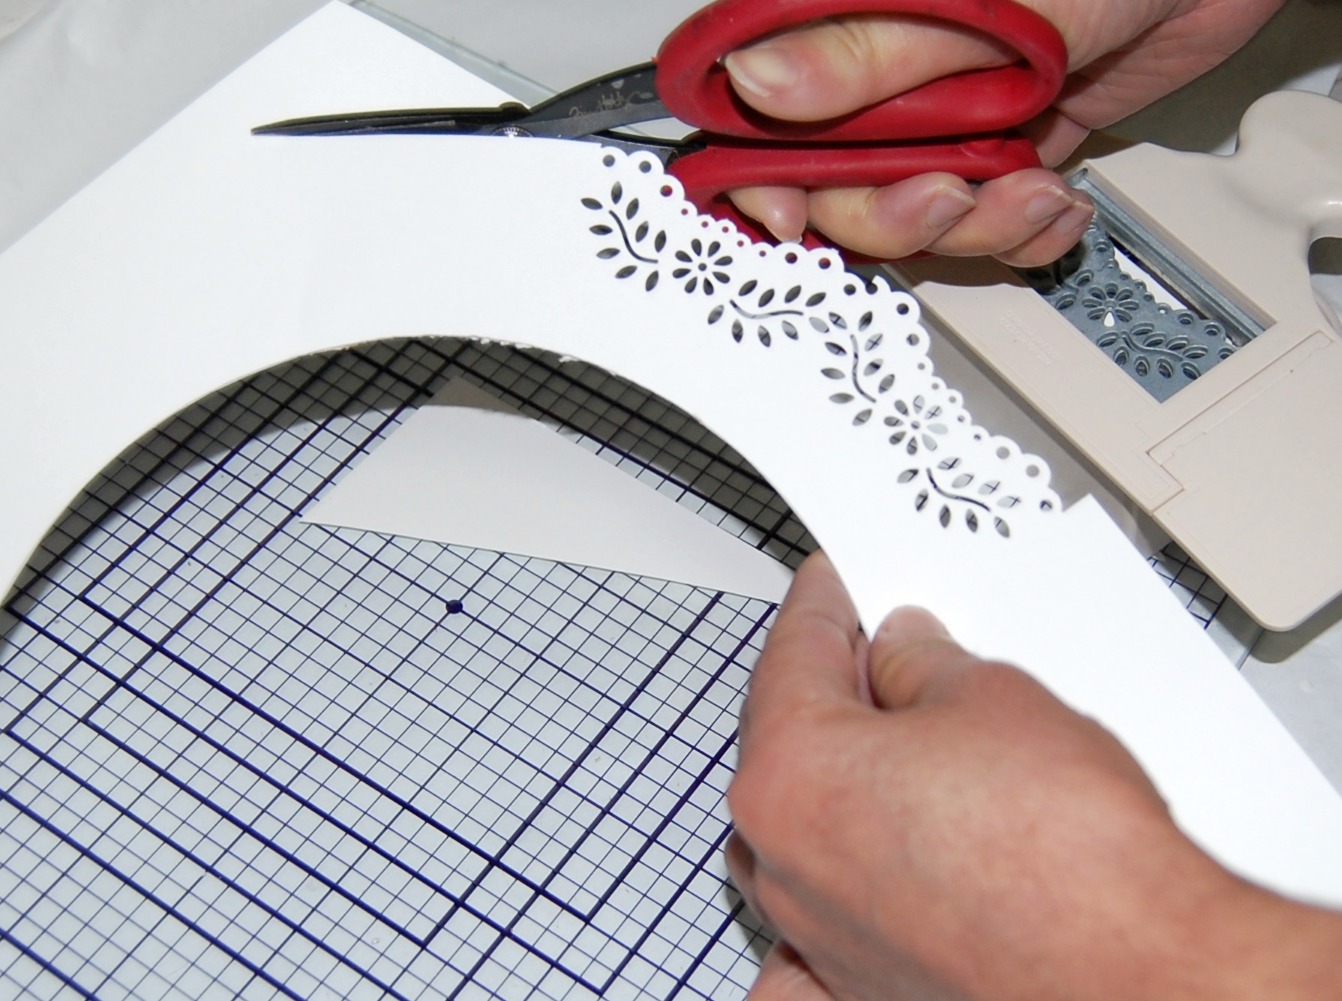 |
| Continue doing this around the hole... |
 |
| Try to position the puncher to make the design look even... |
 |
| Doesn't need to be perfect but it needs to look good.. |
 |
| This is the result. The circle mat and the lace circle layer. Now it's your turn to experiment with this technique ..so have fun!!! Until next time! Marilyn http://marilynrivera.blogspot.com/ |


Marilyn
ReplyDeleteGreat card and thank you so much for such a clear tutorial.
Myrna
This is great! Will have to give it a try!
ReplyDeleteHow awesome is that...will definitely be giving this a try!
ReplyDeletewow - awesome indeed, must give this a go, great tut.
ReplyDeleteThis is very clever Marilyn! Great tut!! You are one very creative lady!!!
ReplyDeleteok, this tutorial is awesome! LOVE the outcome Marilyn! Thanks for sharing! :)
ReplyDeletei love using punches! thanks for the tut. just a suggestion--using an even larger or (smaller) circle to make a sort of frame and then use the punch thereby eliminating the use of scissors to cut away the excess. i will try your way first and then try the circle frame--see which way works.
ReplyDelete