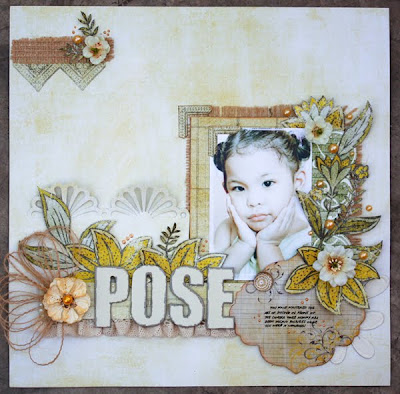
As I have tried several cameras I found out that the main key to get a good photograph of your layout is LIGHTING. Here are some tips that i have read and discovered:
- the best time to photograph your layout outdoors is 1hr after sunrise and 1hr before sunset. This is the ideal time of the day because the sunlight is not that strong and the brightness is just right.
- when taking photos indoors, take a photo in the afternoon when the sun is so bright. Find a room that has enough light. Make sure that the wall painting is white because colored rooms bounce back the colors to the layout.
- you can also use a white cardboard to bounce the sunlight.Simply locate the sunlight in your room. Position the cardboard directly to the sunlight to bounce the light towards your layout.
- if you want to use an artificial layout, create your own mini lightbox. You can find the intructions here: HOMEMADE LIGHT BOX. If I have time I definitely will make me one of those.
- never photograph your layout using your flash or putting your layout directly to the sunlight! This will create strong shadows or the light might bounce back on the photo of your layout if you have used a glossy photo paper.
- you can adhere your layout on a wall at eye-level
- you can also use a photo stand
- or simply place your photo on the floor (this is mostly what I do)
- before taking a photograph of your layout, imagine a grid on the view box of your camera. Make sure that the spaces on all sides is parallel to the layout.

CAMERA. I think the best results is with a digital camera, preferably an DSLR camera like the Canon Digital Rebel. But if you don't have one it is okay to use a regular digital camera keeping in mind that the quality is different when using a DSLR. With good lighting you can still get a very decent photo of your layout.
- Set your camera to Auto Depth of Field setting and shoot. The auto depth of field keeps all elements equally important visually, which makes the text and photographs all stay focused.
- Use a tripod if your speed is below 100 to make your photo sharp.
- ISO must be set not higher than 400. The higher the ISO the greater chance of getting grains-look on your photograph
- Instead of just taking one photo of your layout, take several. It's easy to delete anyway. This will allow you to capture the perfect photo.
Usually I use Lightroom to edit the colors because it has the capability to adjust the colors individually unlike Photoshop. If you edit a color on Photoshop it will adjust the entire photo and make it all green for example. In Lightroom it only adjust the green colors thus you can make it more vibrant or pale. I do them first on Lightroom then I just do the cropping or cleaning(removing spots) on Photoshop.
Whatever photo editor software you use, just adjust the levels, brightness, contrast or color balance to get your desired outcome. Crop it! I suggest you place your layout near you so that you can use it as guide as you do some adjustment. Make it look like as close to the actual layout.
 You're done! You can now upload your layout online!
Hope I was able to help you get an idea on how I photograph my layouts. Until next time!
LG


Thanks so much for the tips! I'm with you, photographing your LOs is an art in itself!
ReplyDelete