Thursday, June 27, 2013

June Challenge Winners

Hi everyone, Amarilys here, announcing the winners for the June Sketch Challenge and the June DT Challenges. Between these challenges we had AMAZING entries and because no one likes the task of choosing a winner, we leave it to random.org! :)

Here's the Prize for the Sketch Challenge


...and the winner for the Sketch Challenge is...

Doris Widder
-----------------------------------------

Here's the Prize for the DT Challenge

...and the winner for the DT Challenge is...

Rina Hough
-----------------------------------------

Summer Stenciling Challenge Winner for prize offered by Tracey


Leila Cassimira Cardoso
-----------------------------------------

***Challenge winners please PM Tracey your information (e-mail and mailing address) within 7 days of the challenge ending date or you will forfeit your RAK.

Congrats ladies! I want to take this time to encourage you to play along the monthly challenges. The July Challenges will open during the Blog Hop and Kit Reveal this Friday, 6/28. Hope to see you there!

Wednesday, June 26, 2013

July Kit Sneak Peeks!! "Hope Chest"

Guess what time it is?  It is almost Reveal Day and time to introduce our July Scrap That! Kit "Hope Chest." Our Design Team has been super busy this month creating with this fabulous new kit! 

 So, they are excited to share a few sneak peeks of their lovely work:


Stay tuned for our Blog Hop and July Kit reveal on Friday, June  28th, 6:30 AM EST. 
 You will want to visit all the designer's blogs to see their gorgeous work with this month's kit ...

 and for a chance to win our Grand Prize this month, a retired kit from 2012 containing the Fabscraps Organic collection.  Loved that kit!!!! 


Thanks for coming by! See you Friday! 

Tuesday, June 25, 2013

Introducing our July Guest Designer, Natasha Naranjo Aguirre


We are so delighted to introduce our July Guest Designer, 
the fabulously talented 
Natasha Naranjo Aguirre.


Natasha is an amazing mixed media and paper artist designing for Donna Salazar Designs, The Dusty Attic, Pion Design and Zva Creative.

"Hi!  My name is Natasha & I’m the mother of two wonderful children & the wife of an amazing, supportive man. I am a floral designer by day and a scrapbook designer by night. I first discovered my love for scrapbooking in 2004 but was unable to scrap because I was a single mother at the time. For years I was unable to craft, but my passion for it never faded. I married my soul mate in 2010 and my husband inspired and encouraged me to start creating. If it weren’t for him, I would have never have been able to begin doing what I love.

As for my scrapping style... well, I don’t know how to categorize my style LOL. I just create using products I love. I love to incorporate different techniques in my work and use a variety of elements. Every day I am inspired by the work and talent of others, and I hope to be able to inspire others with my work as well."

 Be sure to stop by Natasha's blog to see her gorgeous work:

Sunday, June 23, 2013

Layout of the week - Tina Suitella

I love this card...the colors the design and the cool sentiment!  The woman with the red boots and cool umbrella!  This really is a striking card!


I would be so happy to receive a card this fabulous!!!!!!

Help me congratulate her!

Saturday, June 22, 2013

Featured Projects by GD Zoe Nemburt


It's Zoe here to share my ScrapThat! June Kit projects with you. First up is my layout using Amy's June Sketch.

"Little Miss Pout"
MK, EAO

Love these butterflies.

Oh and those gems!! 

~ ~ ~ ~ ~ ~ ~

This layout is with the Main Kit and using the Embellishment Add on. The Title is a play on words. "Little Rascal"... Old dirty rusty car...

"Little Rustcal"
MK, EAO

The textures within the papers are breathtaking.

I hand drew those little hearts and cut up some of the crystals.


~ ~ ~ ~ ~ ~ ~

This layout is using items from the Main Kit Only, and you can find my tutorial for this layout here.

"Sweet Fall Smiles"
MK only

Love the colours in the kit 

Yes... you do see me using my silhouette!!! :)

More of Zoe's lovely work can be found on her blog.

Friday, June 21, 2013

Build A Page with Tracey G.

Hi everyone! Today I am going to walk you through the steps I took to make one of my pages using the gorgeous June kit! Ready? Let's start!

Thursday, June 20, 2013

Sandi's July Kit Creations


Sandi here today with more details for my June Kit creations! 

Although I didn't want my layouts to be too cliche, I thought this was the perfect opportunity to scrap some photos about a trip to Santa Fe last year (snagged from the Inn on the Alameda Blog to augment my own photos from the trip.  I did a ton of paper layering and distressing on this one! Amy's great sketch is perfect for getting in lots of luscious layers. I painted my largest doily with some black paint to  complement  the darker color in my photo and then split it in half so that I could let it peek out in a couple of places. 

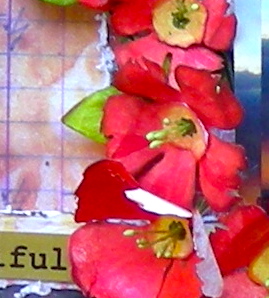
 You'll see that I hand crafted some one layer flowers that I've named the "Pueblo Rose." They are meant to loosely resemble the Scarlet Globe Mallow. I did a tutorial on them here last week.  I've also added in some bits of a vintage Prima vine from my stash. I printed my photo 3 times and layered them for a more dramatic effect. Isn't the black mesh from the Kit a perfect backdrop?!

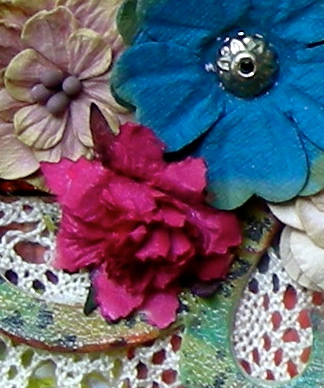
Here are a few close-ups:


_____


For my next project, I had some fun with my Lindy's Stamp Gang inks and let the colors drip as they wanted. So yummy and fun! After getting a general idea of how I wanted my page to look, I took to my favorite way to distress my papers .. FIRE! First, I must say that I only do this when the hubby is home,  just to be on the safe side! One can never be too careful!!! I stand over the kitchen sink and use the flame of a candle on the edges and let it burn until I'm happy with the amount it has burned away. Then I blow the fire out. These papers wanted to smolder a bit longer than most, so I left my project on the counter for awhile after dampening the burned edges a tiny bit. You can see that I've used a few different punches (4) and once again some molding paste and my Tile Textures stencil. I'm counting 8 paper layers, how about you? 

I also had fun with my chipboard flourish that I treated with Gesso, inks and a Prima Firefly stamp. I finished it off with Ranger's Clear Rock Candy Crackle paint. While arranging my flowers, I decided to add in a few wisps of sewing thread that was tangled up in my mending basket and used it there as well as on my Dusty Attic title chippy. (The title chippy and ecru lace are from my stash.) I finished up with wood buttons from the Kit as well as the  Prima crystals which cut up and used in various place. 


Close-ups:


______


Last but not least is a "softer" page that I really, really love. It is so pretty IRL. The photo is a night time view of Santa Fe that had great colors but in the long run I opted to convert it to black and white for a "frosty" look.  I've done a few layers here as well and did a wet distressing technique with them.  On the last layer, I've used some Lindy's Stamp Gang in Autumn Maple Crimson, then topped that with some molding paste and a Prima Donna Downey Poppies and Peonies stencil. While experimenting with my ribbon, I came up with this squiggly effect that reminded me of the mountains, so I decided it was a keeper and then added my pearls in fashion and adorned them both with my large blooms.  The title chippy is a Blue Fern product that I inked and stained so many shades of brown that I lost track! =) It sure does shine though! I wanted that wintry look to my page, so the Dress it Up flats were perfect to for adding more shimmer. I tucked in the small doily from the Kit as well as some cheesecloth from my stash. My Maya Road butterflies were left untreated except for some Rub and Buff. 

A few close-ups:


That's it for this time! Thanks for coming by!