Tuesday, October 16, 2012

October Sketch Challenge Winner


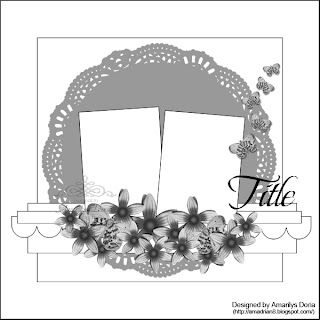
Hi everyone, Amarilys here. We had 5 amazing entries for the October Sketch Challenge and I'm glad that  we use random.org to choose a winner because there is no way that I can!

So, according to random.org the winner is.......

Monik Proulx
Congrats Monik! 

I want to take this time to encourage you to play along the monthly sketch challenge. The next one opens on October 26th during the blog hop. Hope to see you there!

Monday, October 15, 2012

October DT Challenge - Use Pink and Ribbon.

It's Tracey here to host the October DT Challenge. Since it is Breast Cancer Awareness Month, my challenge for you is to include some pink on your project along with ribbon. 

Check out the post in the ScrapThat! Forum for the contest guidelines and prize information.

Here is my example using this page from the October Kit. Portions of the background paper and doily are pink, and I scrunched the ribbon on the left side of the page below the photo.

I can't wait to see what you create!

Guest Designer ~ Patti Hamil's Tip Toe Through Fall Creations

We are so excited to have the talented
Patti Hamil
as our October Guest Designer!

Our October Tip Toe Through Fall Kit features a selection of papers from Prima's Tea Thyme Collection paired with gorgeous coordinating embellishments. 

We are so grateful that Patti has agreed to share her talent with us this month. I'm sure you will agree that Patti's work with this kit is simply amazing!! For more inspiration, please visit her blog at:

Lasting Love 
~ Using Amy's October Sketch ~
50's Style
Aunt Mae

Just for You

To subscribe to ScrapThat! or purchase this kit please visit the Scrap That! website.

Sunday, October 14, 2012

LOTW.....Pink Flowers by Tina Suitella

Hi everyone...After looking at all the beautiful additions to our gallery this week, this layout "Pink Flowers" by Tina Suitella caught my eye. I loved her beautiful design and awesome misting!!
Big Congrats Tina...your layout is gorgeous!!! Pink Flower

Saturday, October 13, 2012

Banner layered circle tutorial by Marilyn

Hi there !!! Marilyn here to show you how I made the circle layered with banners in my "Amiga" page.  It is easy to make...


1- First, trace the circle 


2- Determine the distance it would have the banners...


3-Cut strips 1 1/2" inches by 2" inches (In solid colours and in some pattern paper,too)


4- Cut one side of the strip in a "V" shape...


5- It should look like this.....


6- For the pattern papers strips  start punching one side of each strip... 


7- It should look like this......


8- Distress all the banner strips


9- Start to gluing the strips around the circle line...the banner goes in the top and the punch strips goes on the bottom...
It should look like this....


10- Once you had glued all the strips you can add more dimension with 3D-dots.


This is the result, you can see the dimension in the next picture...


I hope this inspire you to try it!!
Have fun!
Until next time!
Marilyn Rivera


Friday, October 12, 2012

Tracey's Layered Embossed Butterfly Tutorial

Hi everyone. I'm here today to share a tutorial on how I made the layered, embossed butterfly I created with the October Kit. 

The stamp in the kit is gorgeous, but didn't quite fit with the photos I was planning to scrap, so I thought I'd use the butterfly on the stamp to create a sweet little embellishment for one of my pages. Here's how I created it:

1. Gather Supplies
Embossing Powder - Copper and Gold
Kit Stamp
Kit Ink Pad
One larger or two small paper scraps from kit (only one small scrap pictured)
Scissors - my favorite fussy cutting scissor are any of the EK Success Scissors.

2. Ink up the butterfly portion of the stamp. If you have embossing ink in your stash, it will give a more crisp image, but the Prima ink pad worked just fine.

3. I mixed two colors of embossing powder together - copper and gold. You can use any color or combination of colors that work with your page, or if you want your ink color to shine through, you can use clear embossing powder. The prima ink dries quickly, so have your embossing powder open and ready to pour onto the stamped image immediately. If you are working with embossing ink or other slow drying ink you will have more time to work with.  Don't worry if you have complete coverage with the powder - that will add to the charm of your butterfly. You will need to stamp and emboss two images from the butterfly portion of the stamp.

4. Heat emboss ~ while the powder is still hot and melted, quickly add another layer of embossing power, tap off any excess and heat again. You can do this several times to build up the embossed image. I used three layers of embossing powder on these butterflies. 

5. Fussy cut around the embossed butterflies using sharp scissors or craft knife. 

6. Trim off the antennae from one of the butterflies. Take the one with the best embossed image and bend the wings forward and curl the wings with your fingers. I find that a small paintbrush can be helpful to curl the wings. Using super sticky tape or glue of your choice, adhere the bodies of the two butterflies together. Here is the finished embellishment:

Here's my layout using the
Layered Embossed Butterfly:

These butterflies are super easy to make.
I hope you'll give them a try!

Thursday, October 11, 2012

Cracked Glass Charm Tutorial by Patti Hamil, our October GDT

I'm so glad to be back with you again today to share a tutorial for the Cracked Glass Look Charm I created with the ScrapThat! October Kit. 


Cracked Glass Look Charm
 
1. First of all, gather all of your supplies. Also a couple of pieces of copy paper or scrap paper of some sort. Here are the supplies that I used.

Piece of chipboard
Stamp of choice
Embossing Powder (I used WOW Clear Ultra High)
Embossing Ink
Black ink (I used StazOn)
Off white paint & foam brush
Markers of choice (I used Zig)
 
2. Paint section of chipboard large enough for your stamp to fit on. Stamp with black ink and let dry completely.
3. Using markers of your choice, color in your stamped image.
4. Cut down to size you want. Next, you’re going to use 3-4 layers of embossing powder. I used 4 on this one.


5. Once thoroughly dry and cool, take the piece and with your fingers lightly start bending until the powder “cracks”, don’t bend hard enough to break all the way through, just bend in tiny sections until you get the look that you want. It doesn't show well in the photo, but it gives an old cracked glass look!!! It’s really neat on heritage pages!!!


I hope you've enjoyed my tutorial and will give it a try! 

Wednesday, October 10, 2012

ScrapThat! Kit October Creations by Amarilys Doria

Amarilys here today sharing with you the projects that I made with the October Kit "Tip Toe Through Fall".

My first layout is based on my sketch for ScrapThat! October Kit.


We also have our October Sketch Challenge Posted HERE.
Everyone is welcome to participate, all entries due by October 15th.

I titled this layout "Ring Bearer"

I used the Main Kit only for this layout. The bling swirl and large flower are from my stash. The pictures are of my brother-in-law, the ring bearer at my wedding, as he was walking down the aisle. I handmade the butterflies, leaves and title to match the rest of my wedding album.

Here are some close ups of this layout:


My second layout I titled "Flower Girl"and it's another wedding layout


I used the Main Kit and The Embellishment Add On for this layout. The bling swirl, white flowers and doily are from my stash. This layout is also based on the ScrapThat! October sketch but with a few modifications to make it unique but at the same time match the ring bearer's page since they go together in the album. Again, I handmade the butterflies, leaves and title to match the rest of my wedding album.

Here are some close ups of this layout:


For my last layout, I titled it "Family" and it's a picture of my mom, brother and I earlier this year on my mom's birthday.


For my last layout, I used the Main Kit and The Embellishment Add On as well. I handmade my own butterflies and leaves for this layout. HERE's a tutorial on how to alter the orange flowers in this month's EAO. This layout is based on the Prima September BAP sketch. I rotated the sketch 90 degrees to better fit my picture.


Here are some close ups of this layout:


You can find the October Kit "Tip Toe Through Fall" on the ScrapThat! Kit Page. This kit is full of amazing products including gorgeous ribbon, flowers by IAMROSES, Wild Orchid Crafts, Prima and Petaloo, Prima wood embellishments and trinkets, Kaisercraft wood flowers, alphabet set, and pearls, and much much more!


Thanks for stopping! I hope that you are inspired to make something with this amazing kit! If you want to see more of my creations, please stop by my blog today!